I just knew that Isla would love something like rainbow rice. She is such a busy beaver and loves playing with containers and water and most things she shouldn't. And rice would normally fit into that category - you know the category of "get out of the pantry, there is nothing in there for you!". But I must admit that rice is pretty harmless and although usually very messy like sand (I hate sand) - when coloured like a rainbow, I'm suddenly not as concerned about the mess!
Who doesn't love a rainbow mess?
So I thought I would make a huge batch to play with AND use in pots as table decorations at the kids double birthday bash! I got help from this great blog: Learn With Play At Home. The link is here.
I followed the ratio of 1 tbsp vinegar to 1 cup of rice, and even the advice of doing a mass batch of 4 tbsp vinegar plus 4 cups rice. But there wasn't a suggestion about how much food colouring, so I'm sharing mine.
My magic formula is: 1 tsp colour + 4 tbsp white vinegar + 4 cups white rice = coloured rice!
I was going to make 5 colours, but decided to leave out the red so that the pink really stood out. So my rainbow consisted of pink, green, blue, and yellow. My inspiration was Peppa Pig - Isla's favourite tv character and the theme for the kids birthday party!
So here is my interpretation for a beautiful pot of pink/green/blue/yellow rainbow rice!
Tutorial Tuesday: How To Make Rainbow Coloured Rice In 3 Easy Steps
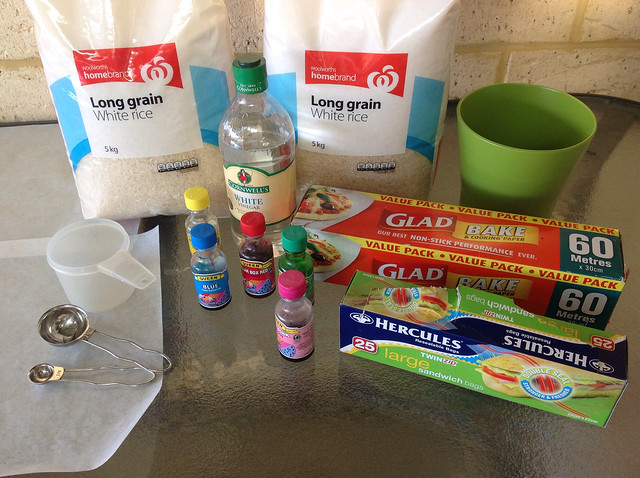 |
| All you will need |
Ingredients List:
- Food colouring (approx. 1 tsp of each colour, and remember - bottled colour gives brighter colours than the combo packs)
- White vinegar (approx. 4 tbsp/80ml x 4 batches = 320ml)
- Long white grain rice (I used approx. 200g per piled-up-cup and my batches were 4 cups per colour. So 200g x 4 cups x 4 colours = .... hmmm let me ask my calculator ;oP ... 3.2kg! You might use less but a big 5kg bag of Homebrand long grain rice is only about $7 I think. And the leftovers would make a great apricot chicken casserole!
Utensils List:
- Baking paper (wet rice can stick to other surfaces like alfoil and definitely to paper towel!)
- Clip seal bags (the bigger the better for the bigger batches and to prevent popping colour everywhere)
- Measuring cups and spoons (you'll need a '1 cup', a teaspoon, and a tablespoon)
- Gloves and apron, protective glasses and a tent (I'm just kidding - but all would be very handy if you're as clumsy as me ;o)
3 Simple Instructions:
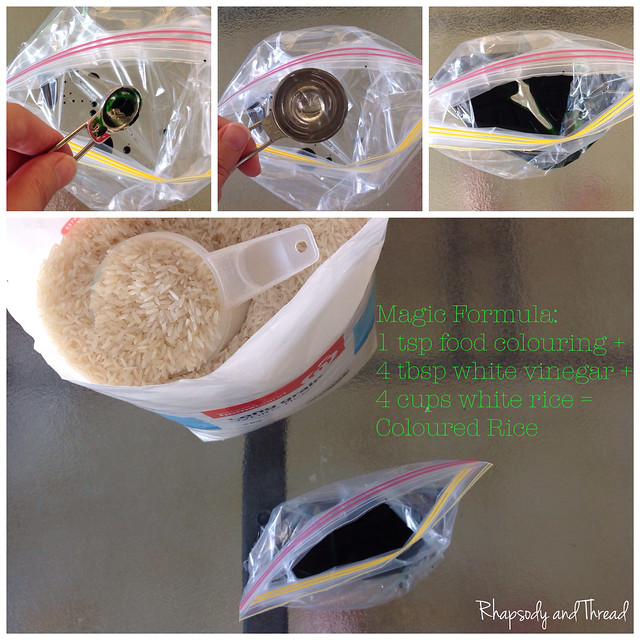
1. Combine ingredients in a clip-seal baggie.
I opened and spread a clip seal bag so that it sat open for me to just pour in the ingredients.
For each big batch of colour, I added the magic formula: 1 tsp colour + 4 tbsp vinegar + 4 cups rice.
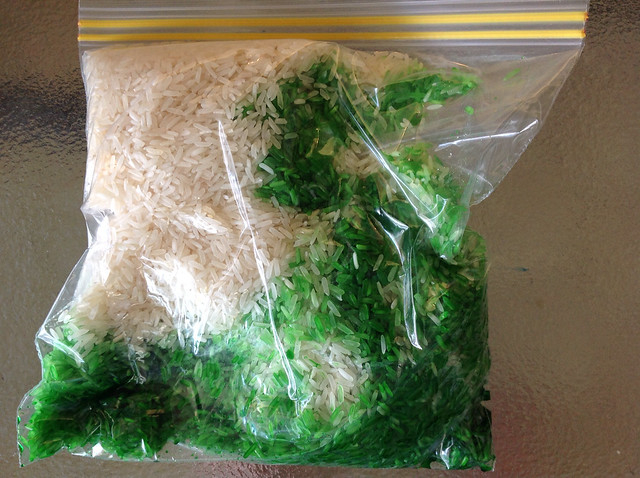
2. Seal bag well and smoosh.
WARNING: Be Gentle/Careful/Cautious!!!!!
And don't wear anything precious - or better yet, wear an apron!
I thought I was a pro and started super-smooshing and ended up with yellow rice e v e r y w h e r e !
Thankfully it was only yellow rice and I wasn't wearing anything fabulous.
 |
| Smooshing in progress |
3. Pour rice out evenly on baking paper to air-dry.
Depending on the climate, the rice should only take 3-4 hours to dry but if you have time then leave each batch overnight.
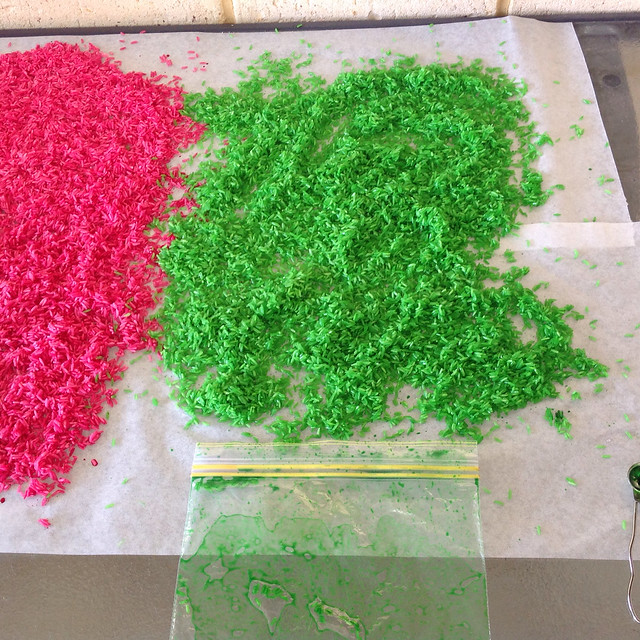 |
| Drying rice |
Once dry, I poured my batches in to pots that I was using as table decorations at the party - to be sure that I had enough rice. I made MUCH more than I recommended for this tutorial because I needed about 10 pots for tables... and I wanted to have some for Isla to play with ;) Of course!
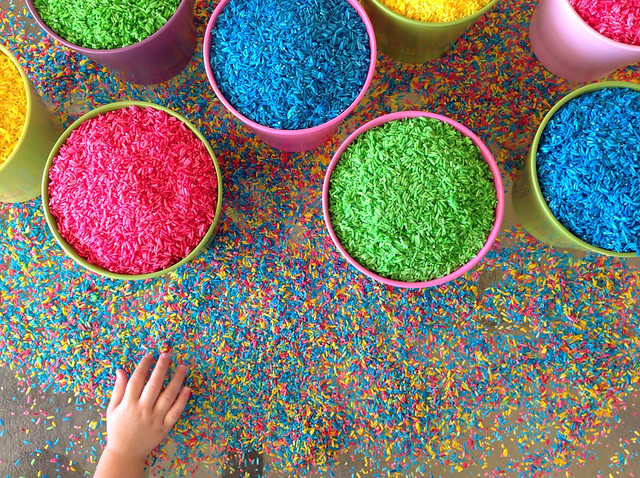 |
| My potted colour! |
As you can see, Isla was desperate to get to the bowls and mix them up for me.
So I popped her up on the table to help and she LOVED IT!
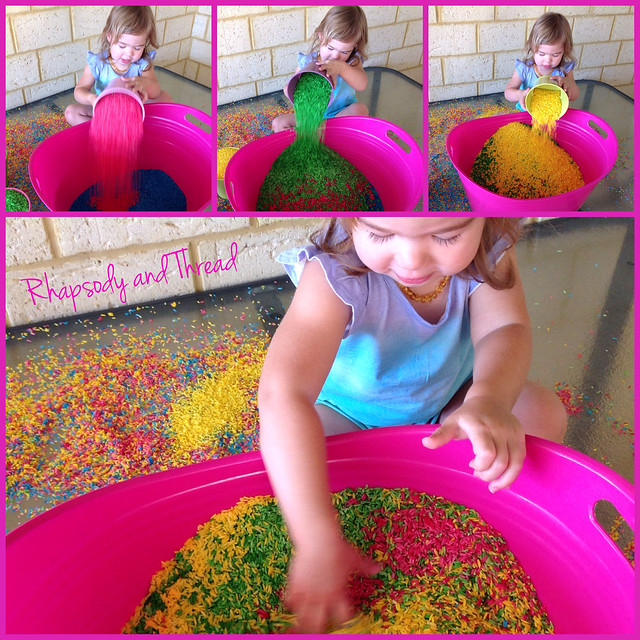 |
| Pour in and mix! |
She mixed them up for me and I threw her Peppa critters in there.
She loved covering them with rice and digging them out again.
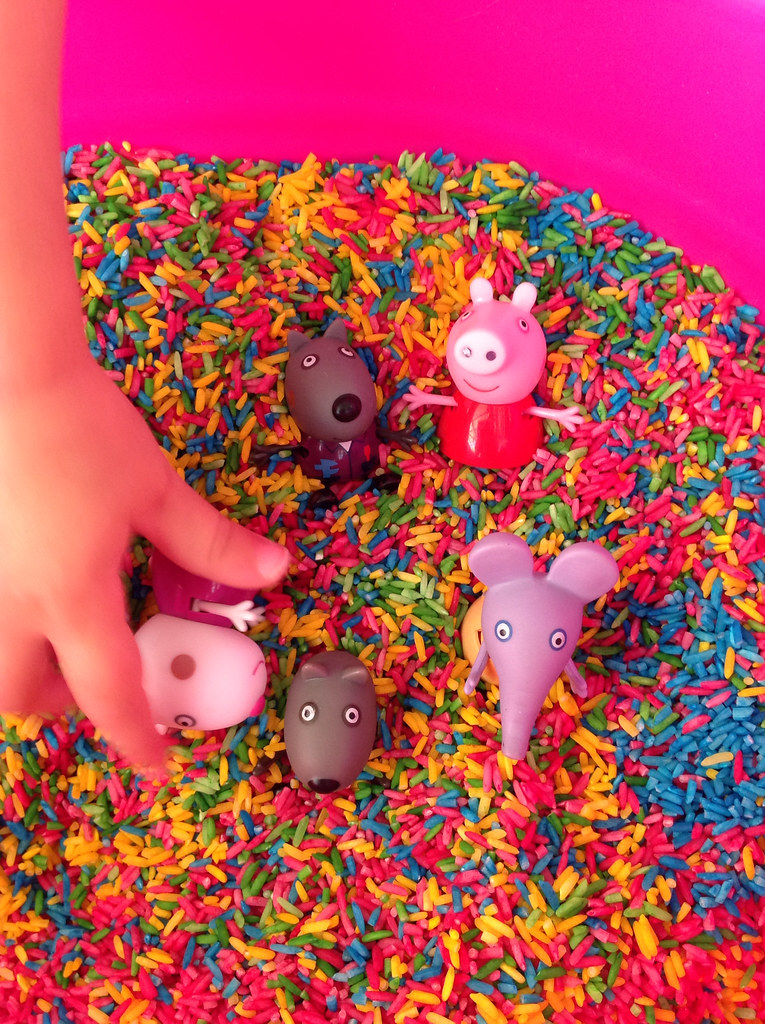 |
| Peppa and friends playing hide and seek in the rice! |

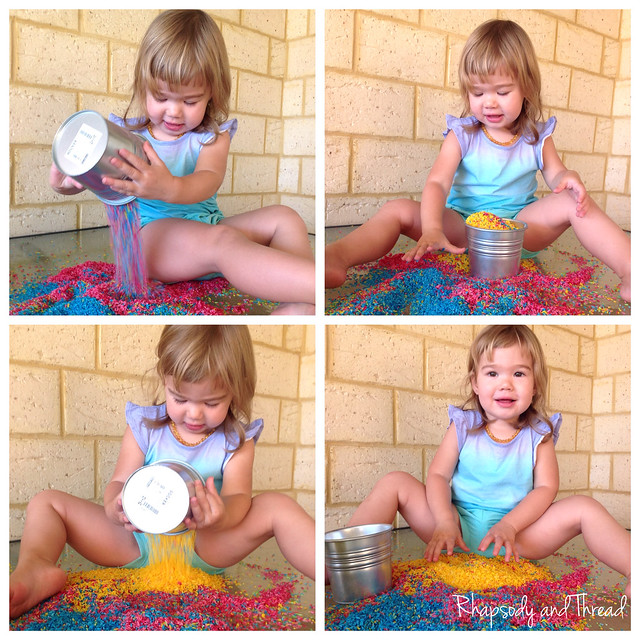
So that was my big batch of rainbow rice made for the party.
And I let her play with the leftovers :)
It was a lot of fun.
I hope you give this a try and your kids have just as much fun! You could even get them involved in the making depending on their age. I know I was too scared to let Isla near the colour or vinegar (for obvious reasons) but she loved pouring the cup of rice into the bag. The great thing is that the measurements don't have to be specific so the kids can get as much in the bag as they can. And they can even help with the GENTLE smooshing of the bag... maybe you should hold the sealed end and close your eyes and hope for the best!
Good luck!!


No comments:
Post a Comment