I LOVE fabric wreaths, they are so festive and fun to make!! And did I mention that there is no sewing involved? Yeah, awesome I know. So of course I added them to my list of "required party decorations" for the Goblins Tea Party on Friday.
You would've seen a great Halloween Fabric Wreath Tutorial by Hott Mama In The City in My 10 Favourite Halloween Craft Tutorials last week. AND you would've also seen the Giant Yarn Spider Web tutorial by Dana Made It. I loved them both and I thought they would look even better combined together.
The only major adaptation was the use of an embroidery hoop instead of a florists wire wreath, only because I have heaps of hoops around the place and no idea where I would get a wire wreath from. But either would work. And any size would work too - just adjust your fabric and wool amounts accordingly. I picked a 14" hoop because I wanted a nice big spiderweb with lots of spiders (eek, shudder!).
So here's how I went, combining the fabulous wisdom of both tutorials!
Spider Web Halloween Wreath Tutorial
=l=l=l=l=l=l=l=l=l=l=l=l=l=l=l=l=l=
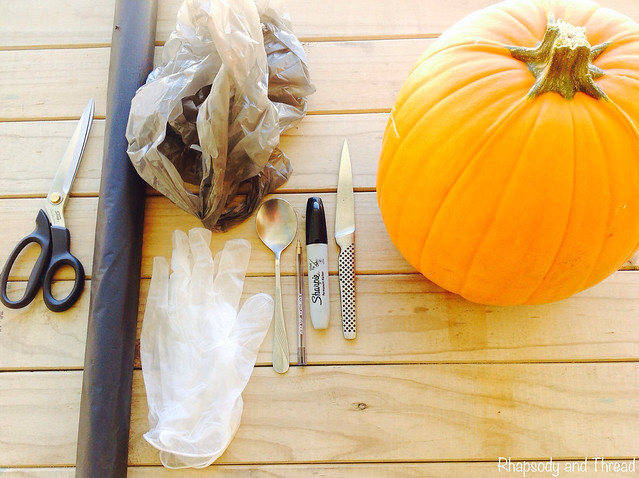
YOU WILL NEED
14" Embroidery hoop
Wool for the spider web
Fabric for the strips (approx. 60" / 1.5m in total - see step one for more details)
Plastic spiders for embellishment
50" length of ribbon for a hanging loop ( the length is up to you and where you plan to hang your wreath)
Scissors (or rotary cutter, quilting ruler and cutting mat if you have them)
Craft glue
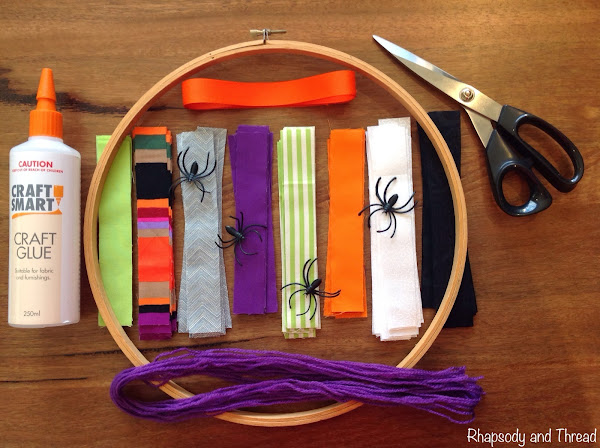 |
| Materials and Tools |
INSTRUCTIONS
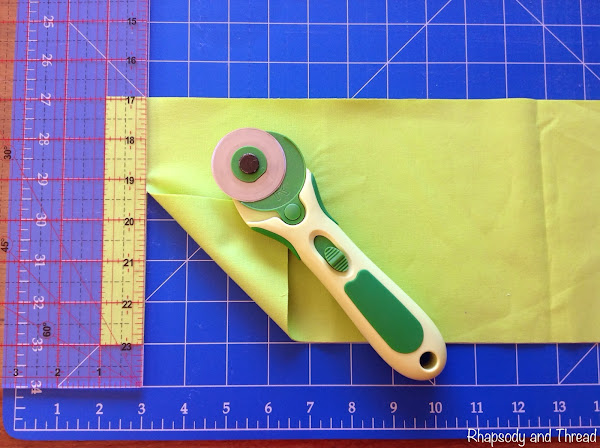
STEP ONE: Cut your fabric into strips
You will need at least 300 6" x 1" strips of fabric to cover both inner and outer hoops.
The average fabric is 42" wide and a 6" length will give you approximately 40 strips. So this was perfect for me because I wanted to use 8 fabrics for a mixture of bright plain colours (purple, green, orange and black of course) and prints. And 40 strips multiplied by 8 fabrics gave me approximately 320 strips. I was also lucky because I had all of the fabrics left over from old projects, but if you need to buy fabrics you'll probably have to buy a 25cm/10" minimum and have leftovers yourself. Some places will let you buy a minimum 20cm/8" minimum, so it's worth asking. Nevertheless, excess fabric is always handy for future projects!
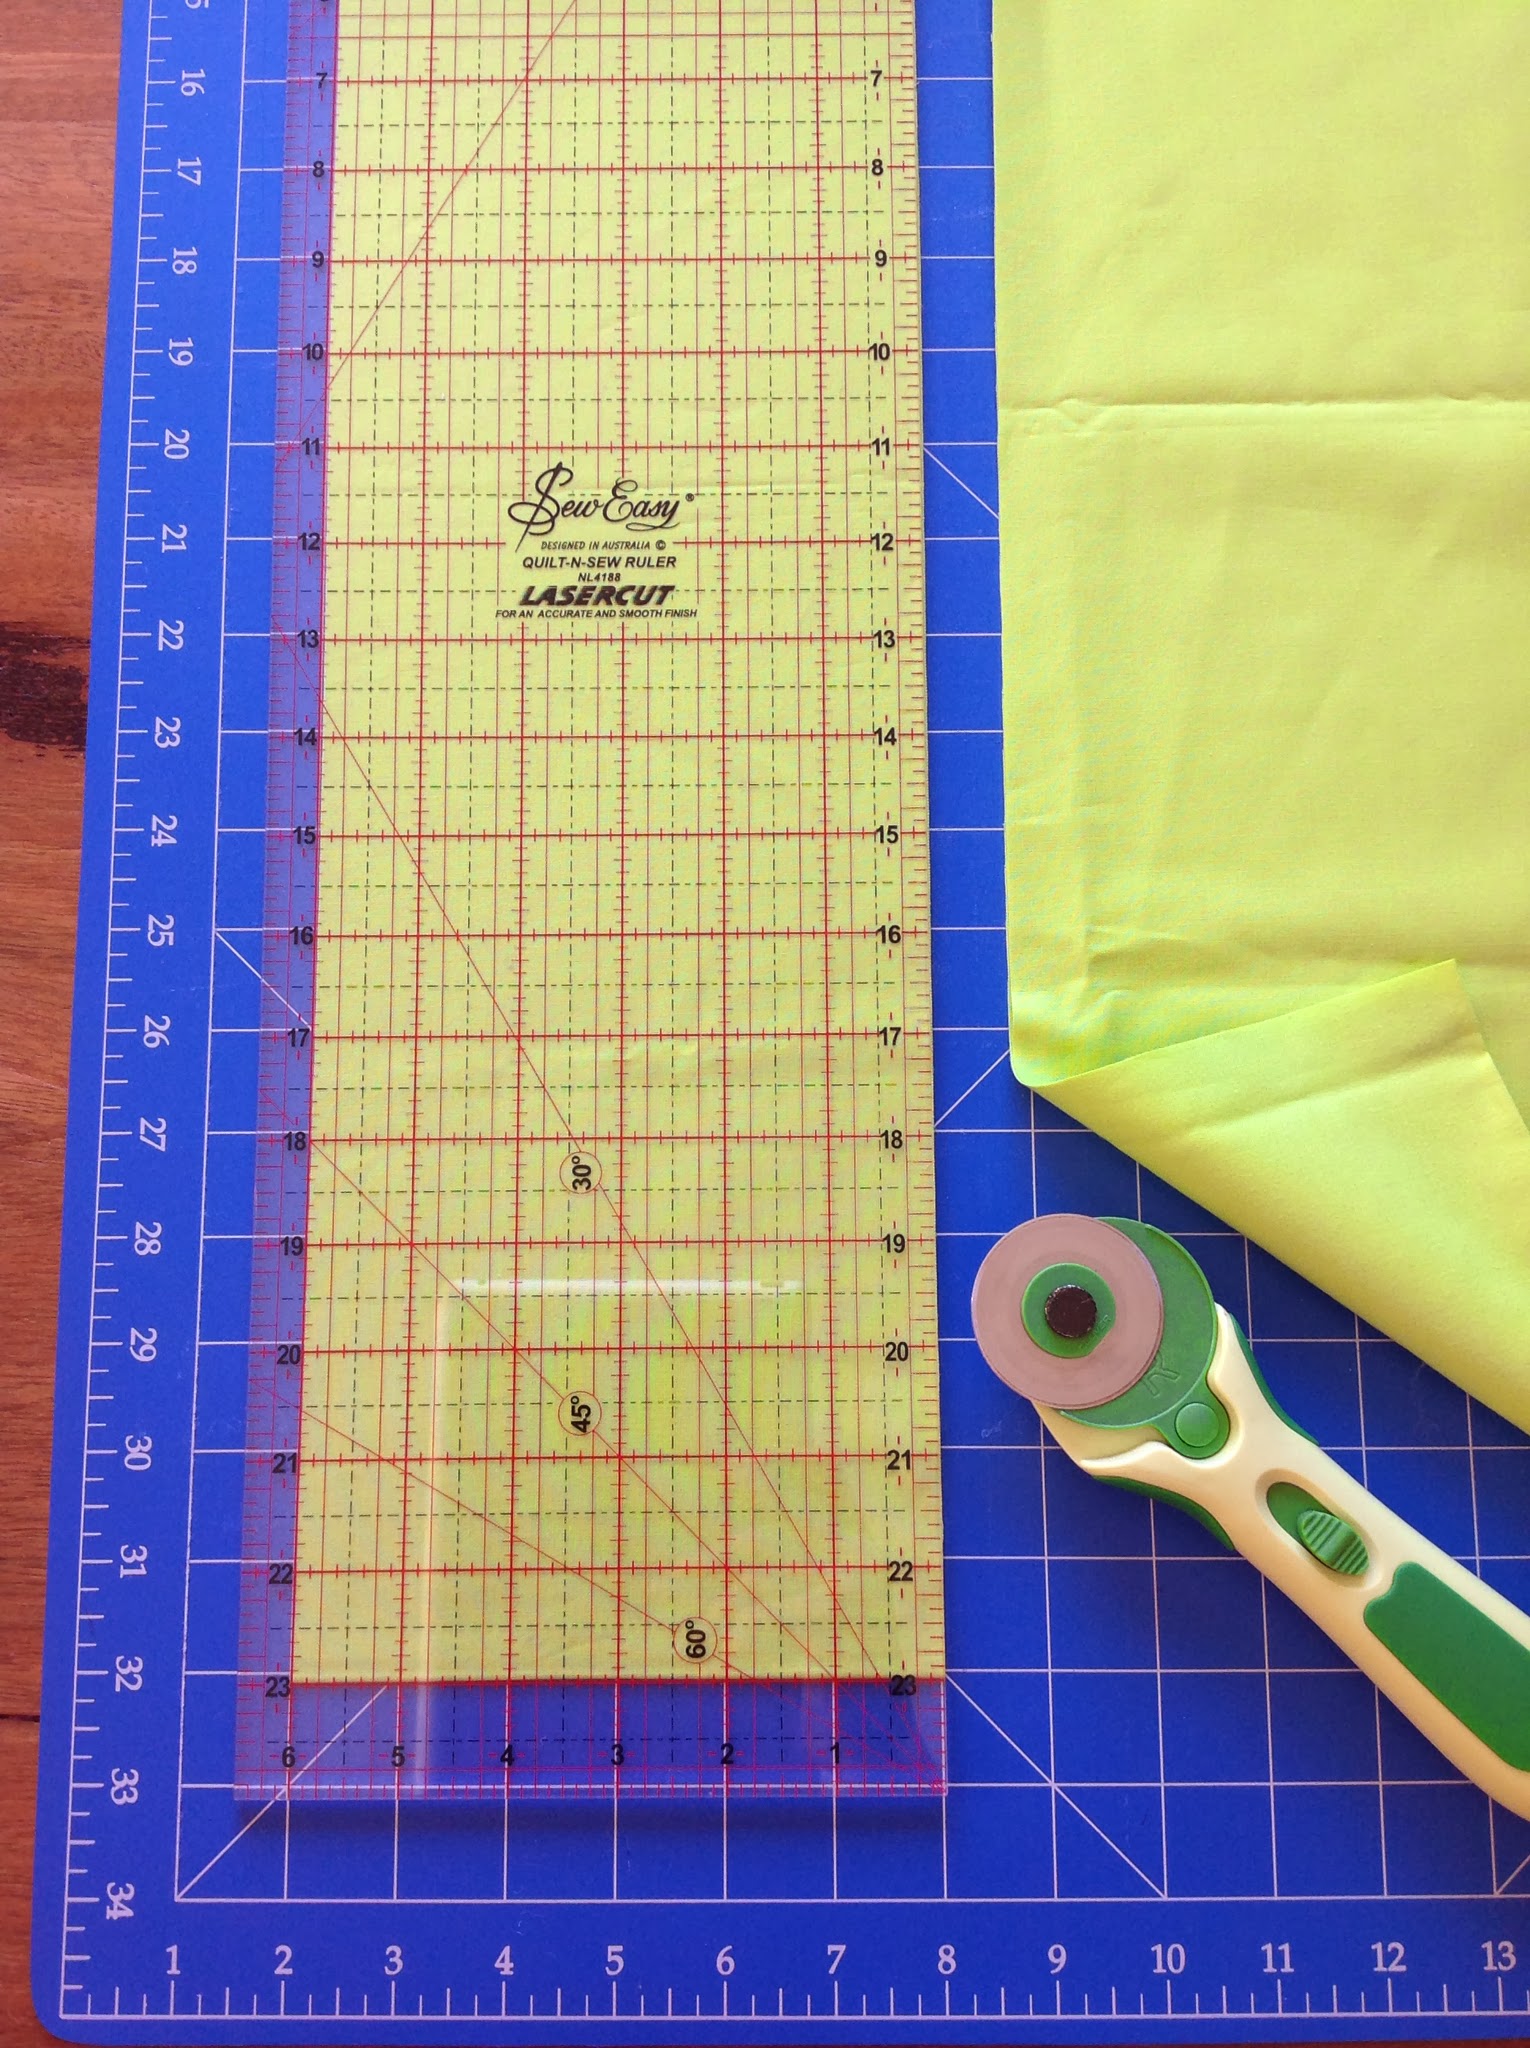
Now, for the cutting you can use scissors or even tear the 6" panel and cut the 1" strips. But if you have a quilting ruler and rotary cutters, you'll find the job even easier. As you can see from my picture below, I folded the fabric in half with the fold at the bottom and the selvedges together at the top. I used the ruler to cut a perfect 6" x 21" panel from each fabric.
 |
| Cutting the 6" panel from the fold up to the selvedge |
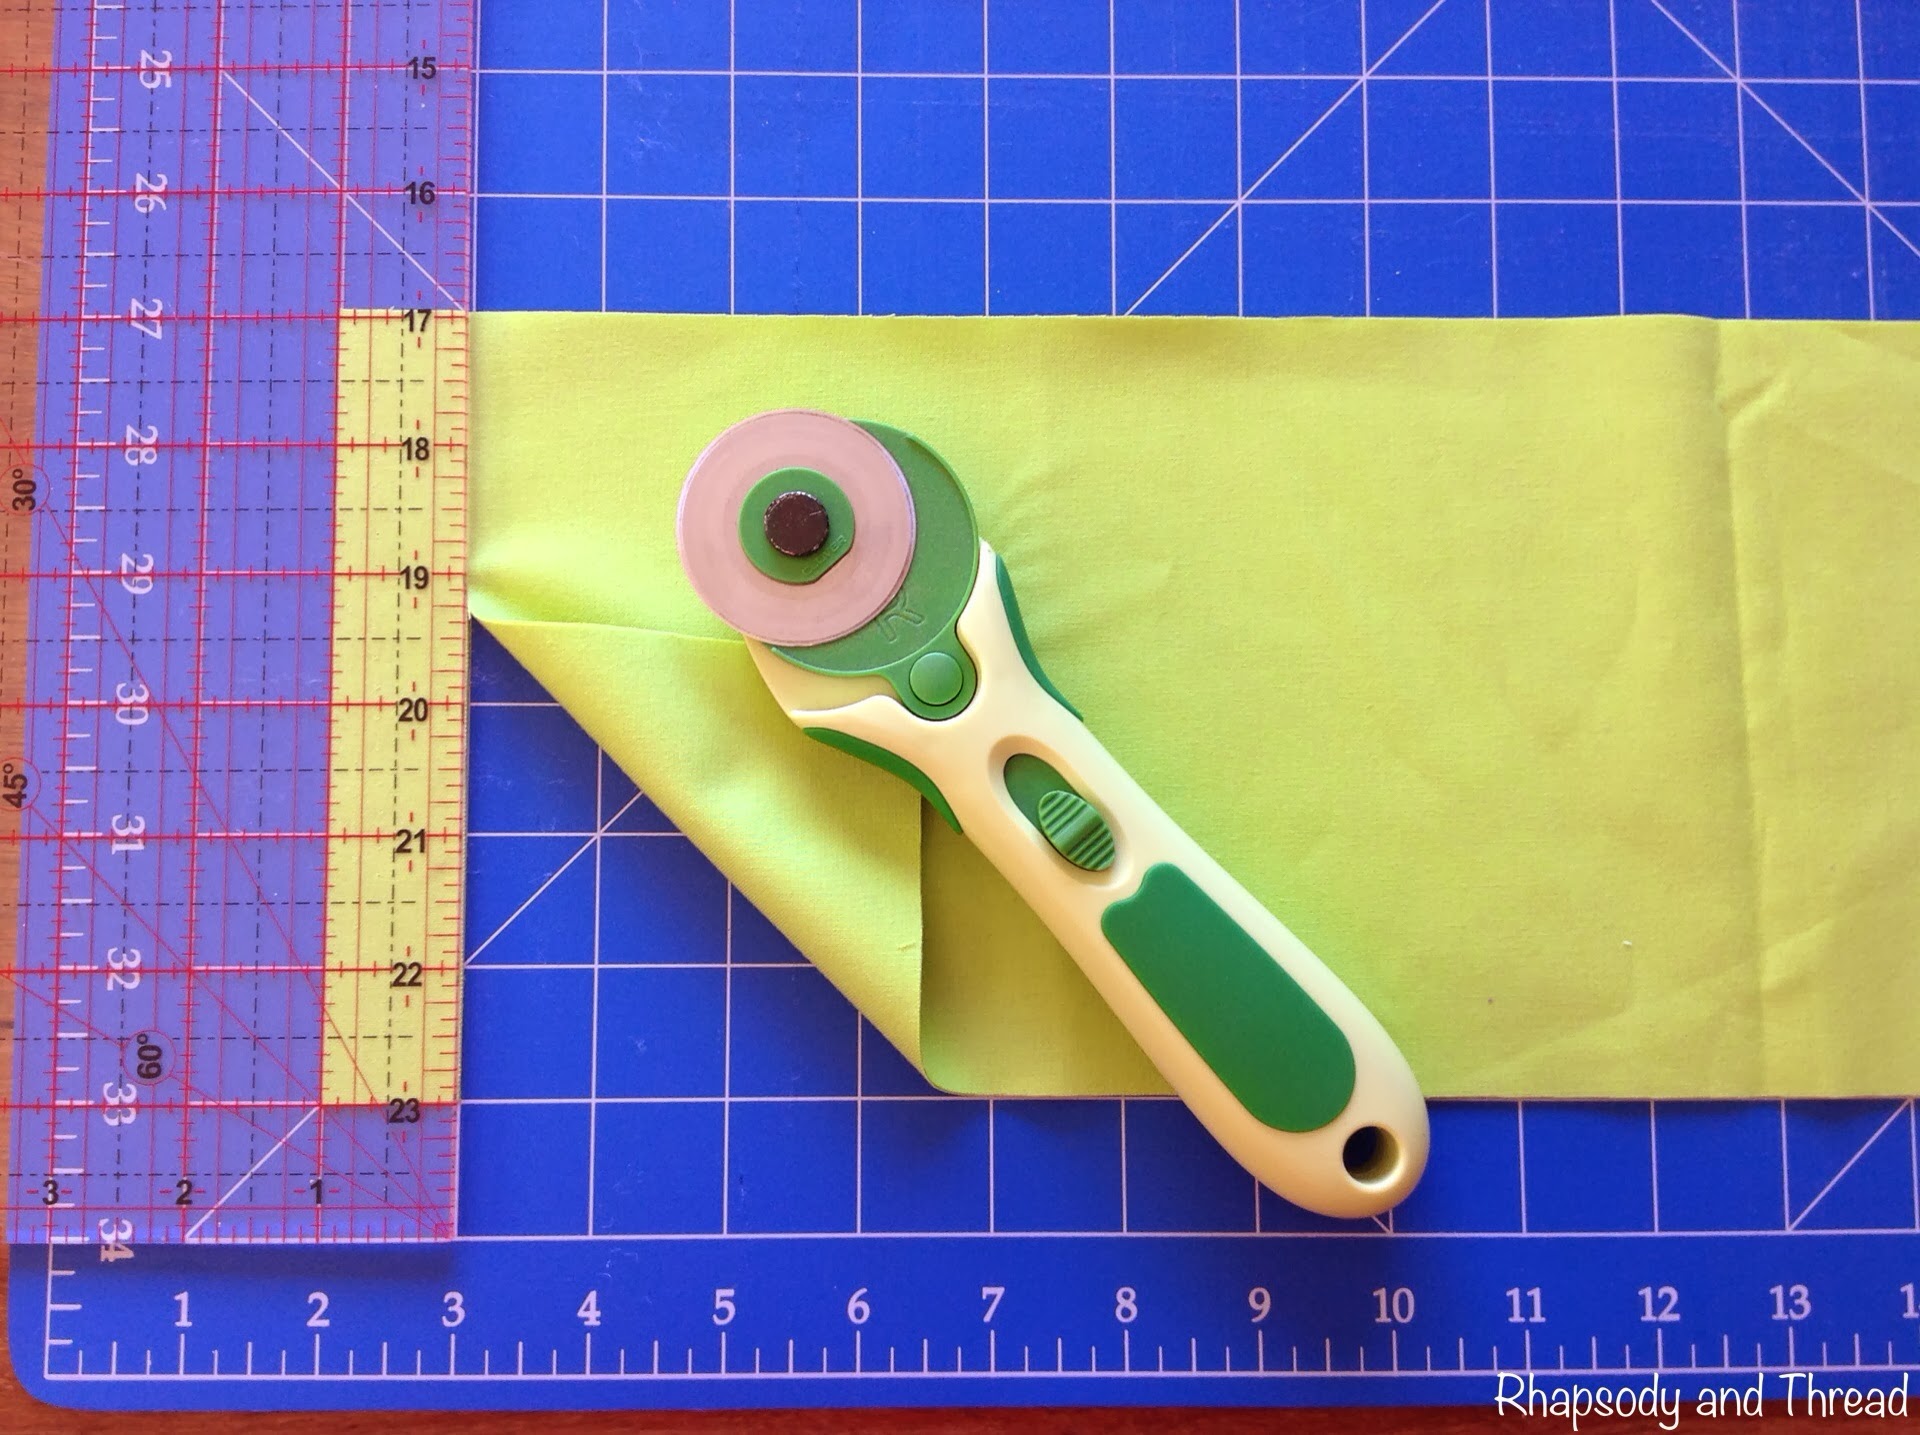
I then turned each panel around and cut 1" lengths, giving me approximately 40 6" x 1" strips of each fabric. And the great trick is that because the fabric is folded in half - you're cutting 2 strips at once!
 |
| Cutting the 1" strips |
When you've finished cutting all the strips up, set them aside in piles to make tying them in order easier later.
STEP TWO: Cut your wool into strips.
To be precise or conservative, you will need 1 x 20" strip, 1 x 30" strip, 6 x 40" strips, and 2 x 50" strips. BUT I just cut 8 x 50" strips and had some leftovers for Isla to play with on the floor! All I did was loop the wool around my left and right hands (like that game we played as kids, except you don't want to go tangling the wool around your fingers) at a length of about 25". Once I got to 8 loops on my left hand, I cut all the ends on my right hand. Perfecto.
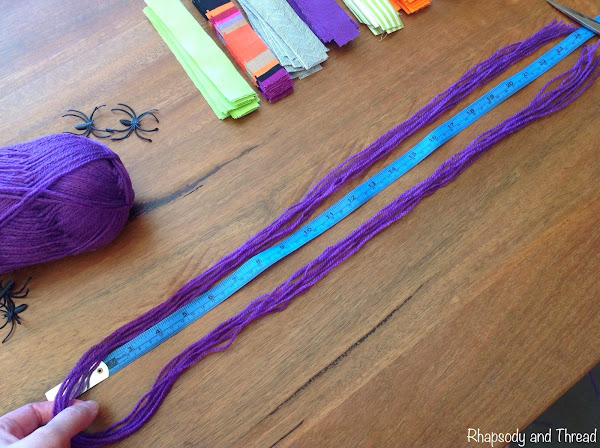 |
| See I had a 25" loop that I cut at one end |
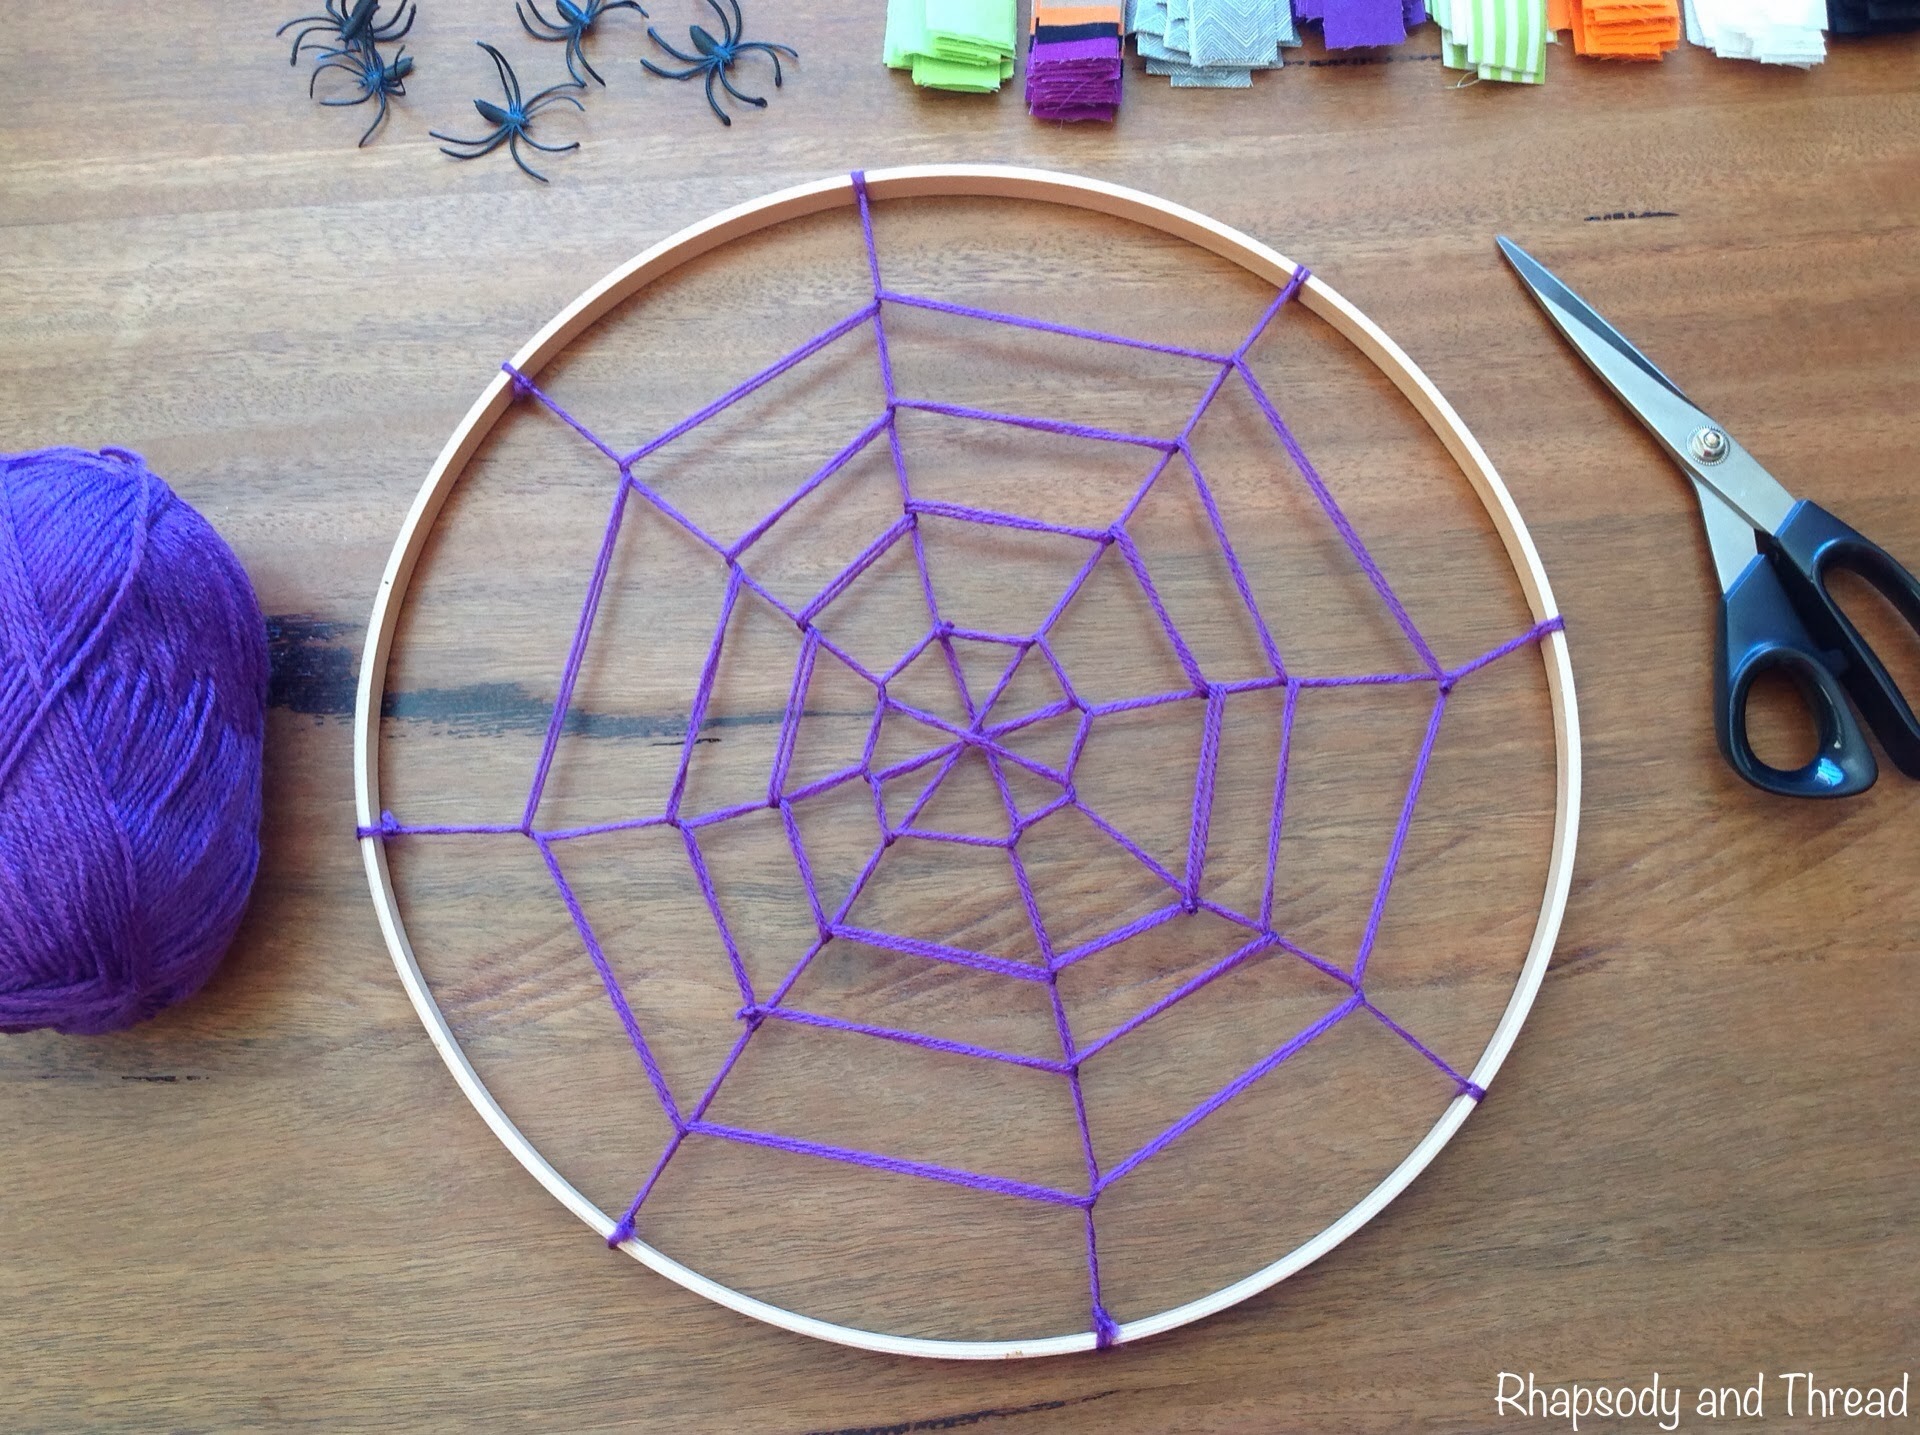
STEP THREE: Spin your spider web
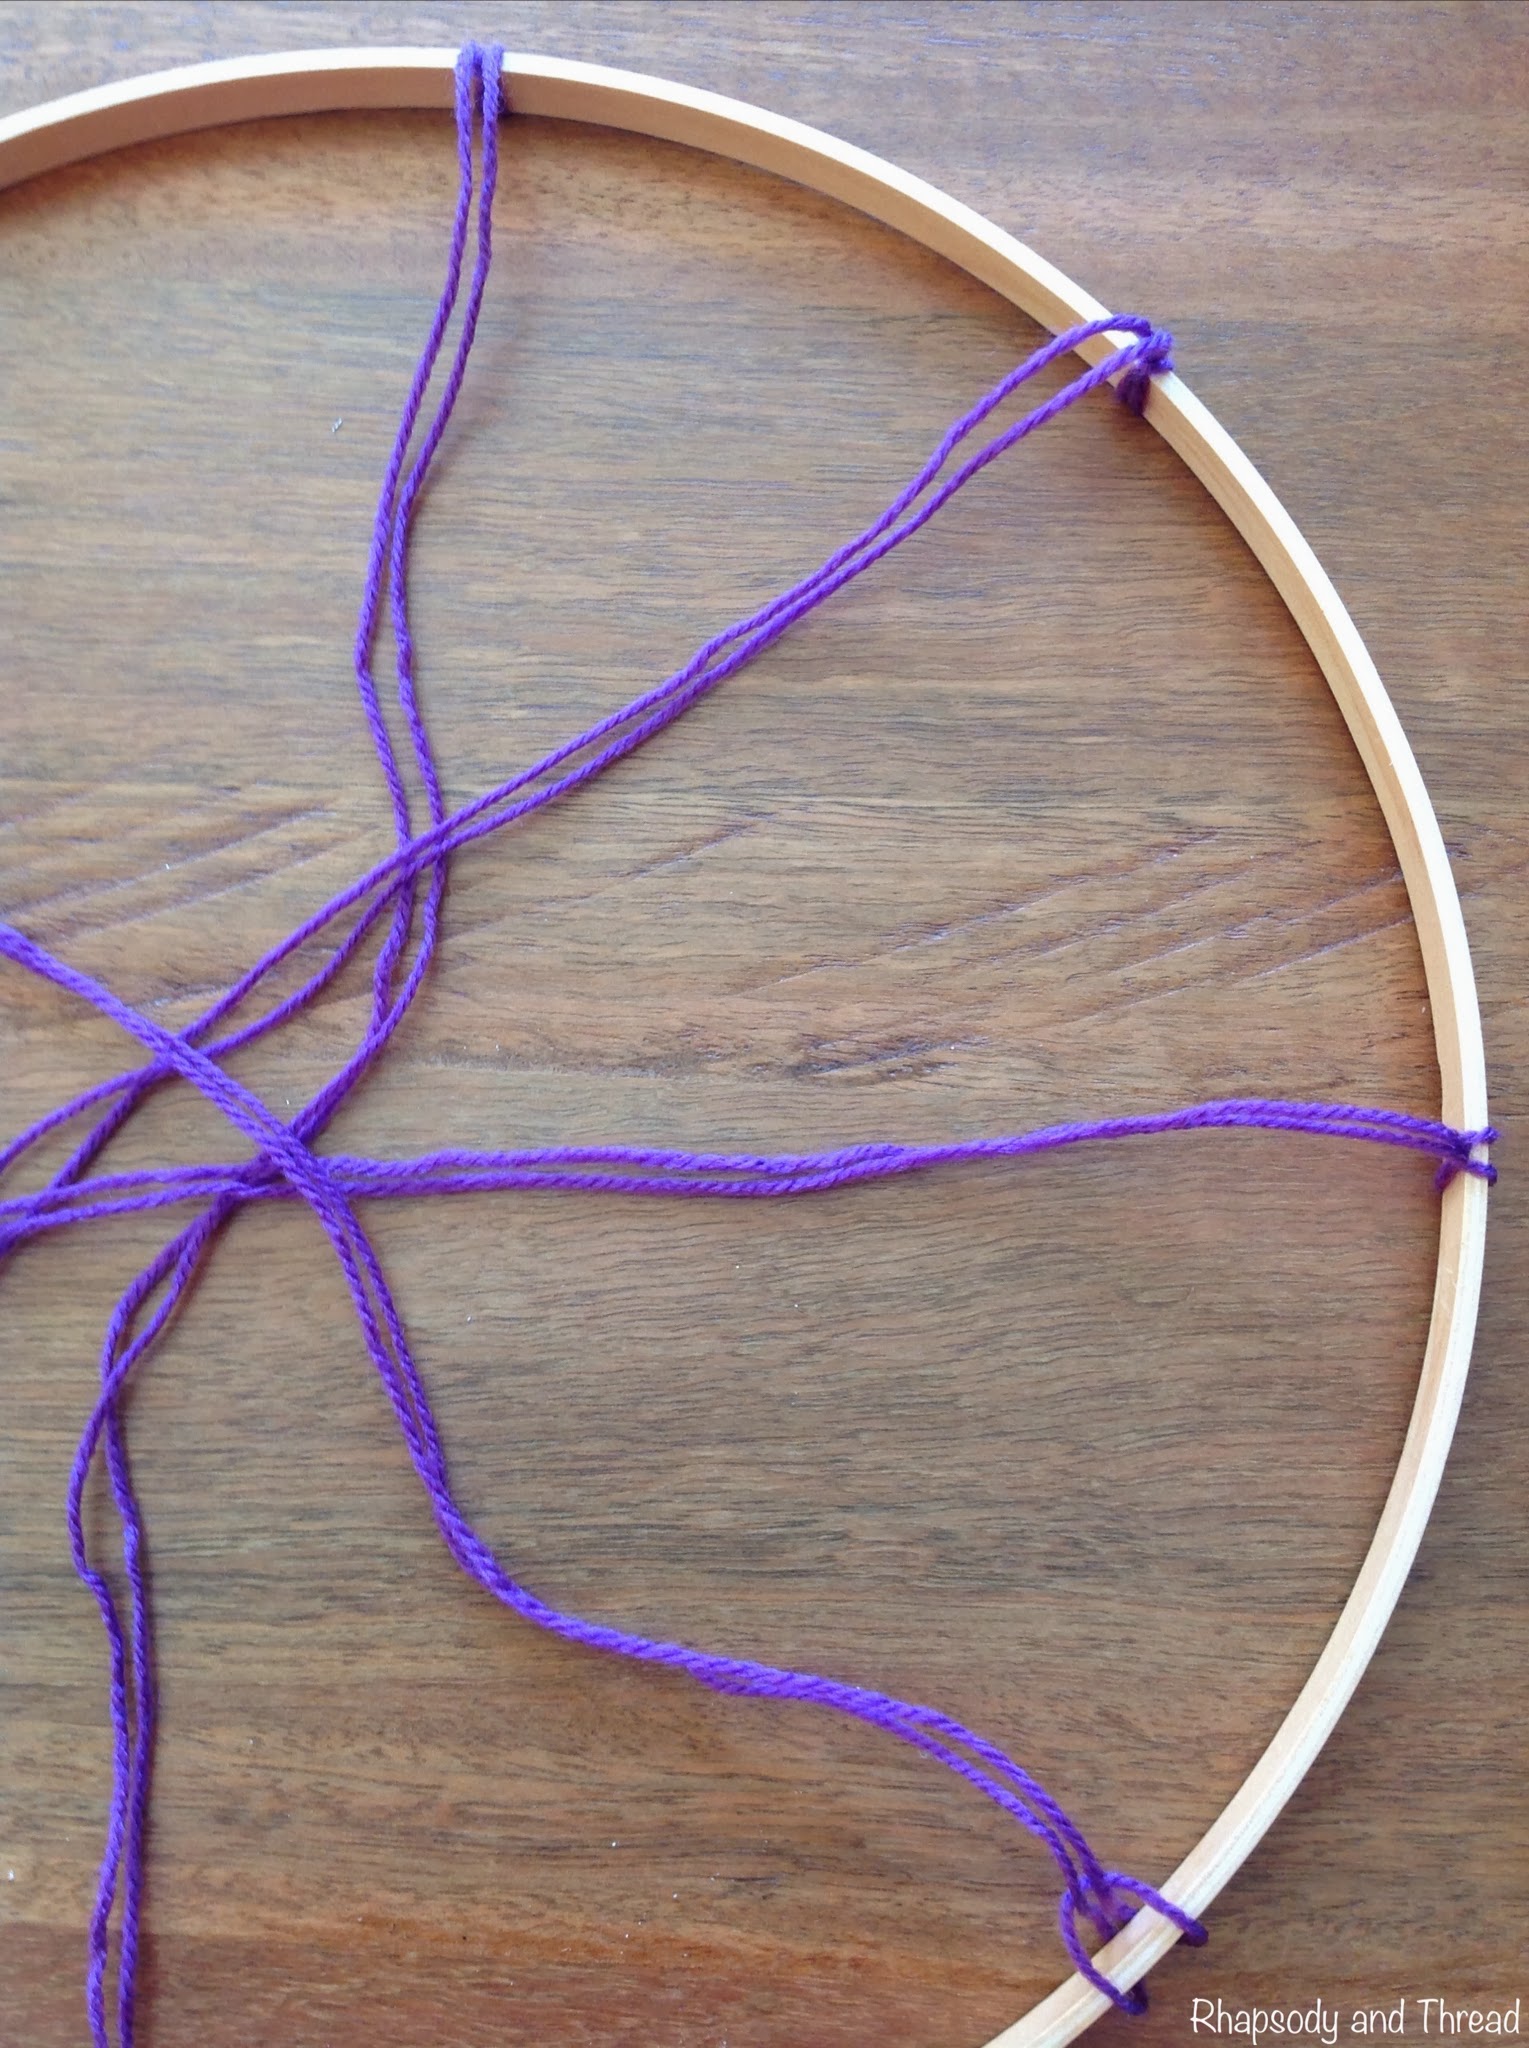
Find your inner hoop and wool strips. Fold 4 of them in half and tie loop knots at ⅓, ¼, ⅔ and ½ on the hoop.
Then tie the strips off at opposite sides of the hoop, making a + and then an x to form a star. Make sure your knots are tight and cut off the excess wool.
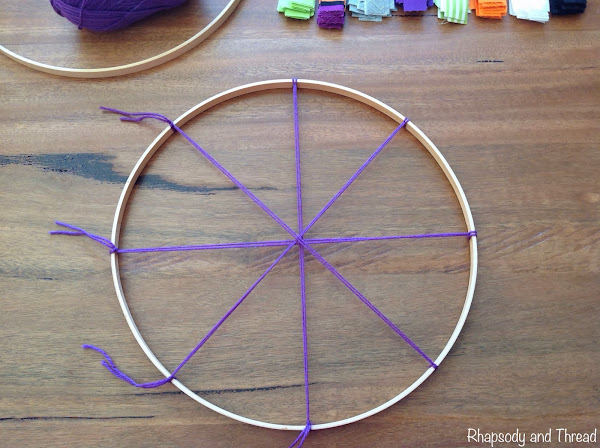 |
| Tied off loops make a star for the foundation of your web |
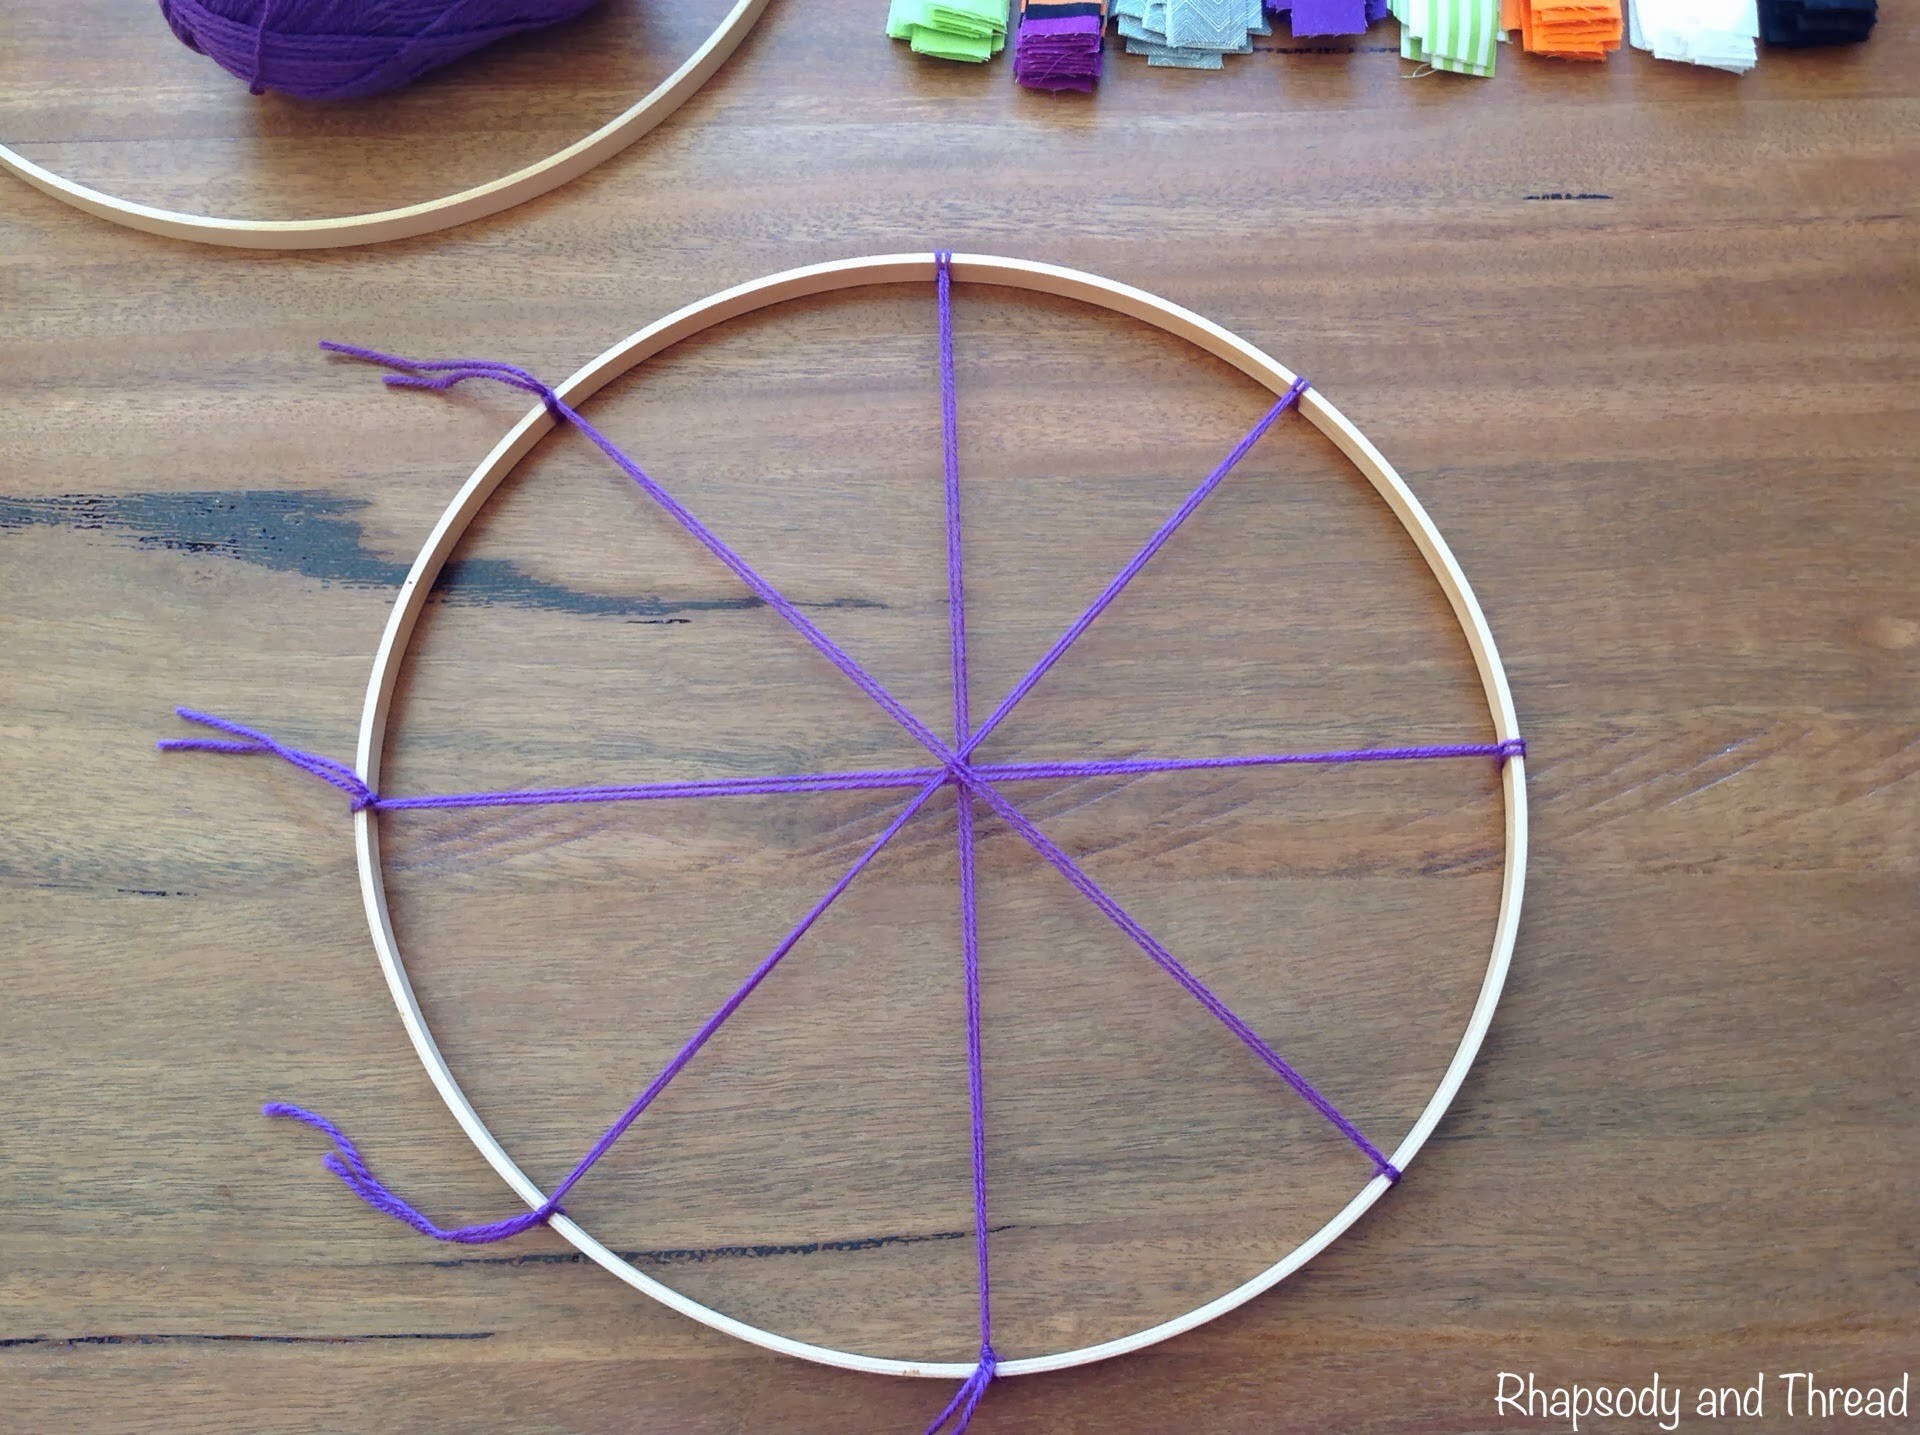
Next make the web rings with the 4 remaining strips of wool. Fold each strip in half and make a loop knot on one of the arms of the web where you'd like the ring to start and end. Hold the wool fairly tight and loop it around each arm, moving clockwise until you get back to the starting point. Tie it off tight and cut off any excess wool.
Handy Tip: I picked a different spot to start each time so that I could hide the knot with a spider.
Making the rings does require some patience because pulling the wool too tight and/or not pulling it enough will result in the ring sliding towards the middle. But I found that with practice it came easier - and it's not a tip but I found that when I'd finished all 4 web rings, it was much easier to redo the ring closest to the centre (this was the hardest one for me to get right).
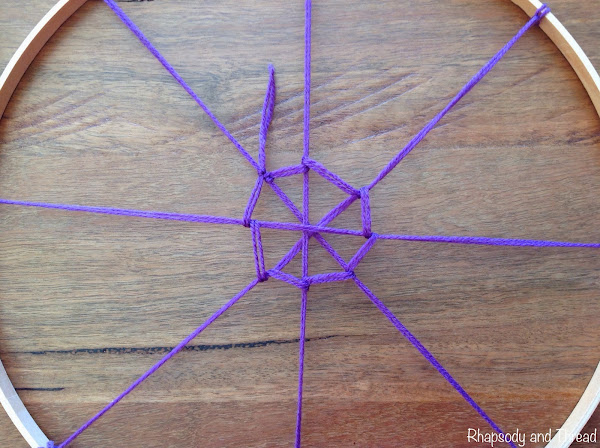 |
| The first ring is the hardest |
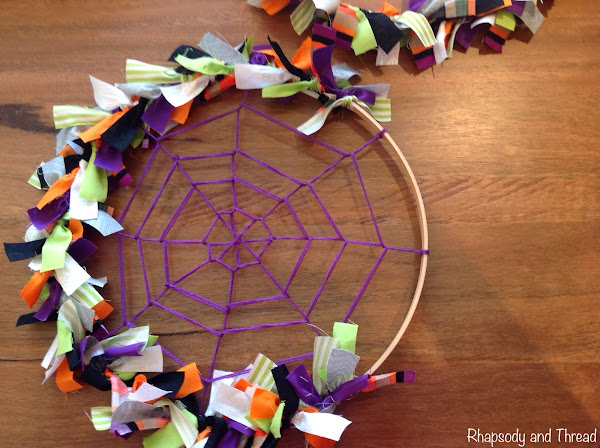
Repeat with the remaining wool strips to spin 4 web rings, and don't worry about getting them perfect. I love the different angles.
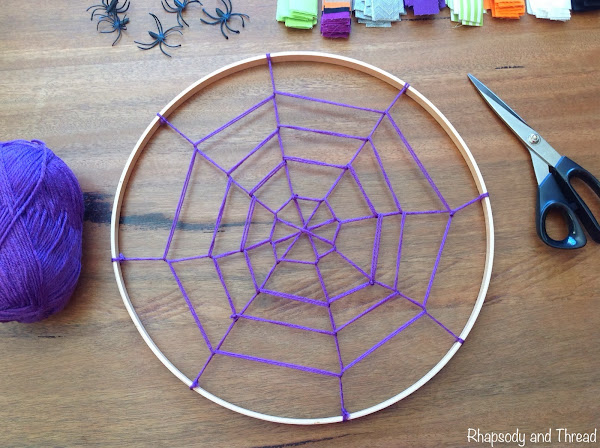 |
| The finished spider web on the inner hoop |
STEP FOUR: Make your inner hoop fabric wreath
This step isn't mandatory but I wanted to cover up the inner hoop and I figured another layer of strips would look even better. So if you want to do the same, line up your fabric strips in the order you want to tie them. Then pour yourself a nice drink and get comfortable because this bit takes the longest.
Start tying your strips around the hoop with the knot on the inside (this is important for when the time comes to fit the hoops together). I found that one knot was enough if pulled tight and I scruffed mine up a bit because I love the look of the loose threads. Keep going until you've covered the whole inner hoop.
* One thing I will mention here is that I didn't push my knots together too tightly because I didn't want to add too much bulk. Basically, the hoops won't fit back together if there is too much bulk from the fabric. So, push the knots together but there's no need to really squeeze them tight as you might with other wreath projects - because remember you're doing 2 layers of strips (one on each hoop).
 |
| Nearly finished the inner hoop |
STEP FIVE: Make your outer hoop fabric wreath
Now find your outer hoop and what's left of your fabric strips. Again, tie your strips around the hoop with the knot on the outside this time. Push the knots together, but remember not too close.
STEP SIX: Join the hoops together
Now this bit took some work and a bit of elbow grease, thanks to my husband, after hearing my huffing and groaning as I tried to squeeze the two frames together :o). Of course, it all depends on how bulky your knots are and how well you separate your knots. See:
 |
| Knots separated to reduce bulk and make it easier to squeeze the frames together |
Handy Tip: I found it easier to keep the outer hoop screwed together. I laid it flat on the table and manoeuvred the inner hoop into it - being careful to keep the strips separated so they didn't get stuck in the middle.
Now that they're joined up, you can pull the strips forward and make them look pretty.
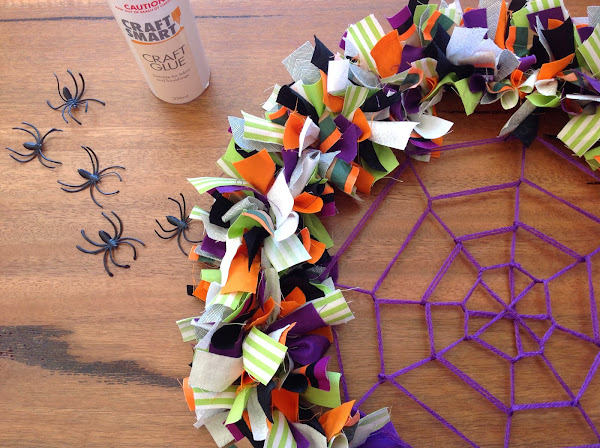 |
| Spiders are on their way... eeeeek!!! |
STEP SEVEN: Add the creepy spiders
Get your little spiders and work out where you want to place them. As you can see in step three, I strategically placed the knots on the web rings so that my creepy little spiders would cover them up.
Glue the spider embellishments to the web using craft glue and allow to dry.
STEP EIGHT: Add a bow for hanging
You can tie your ribbon any way you want really, and at whatever length you need it to be. I cut a 50" length and tied a bow around the screw clasp at the top of the hoop. I thought this would be stronger than gluing the bow on - especially important with little hands around wanting to pull everything down!
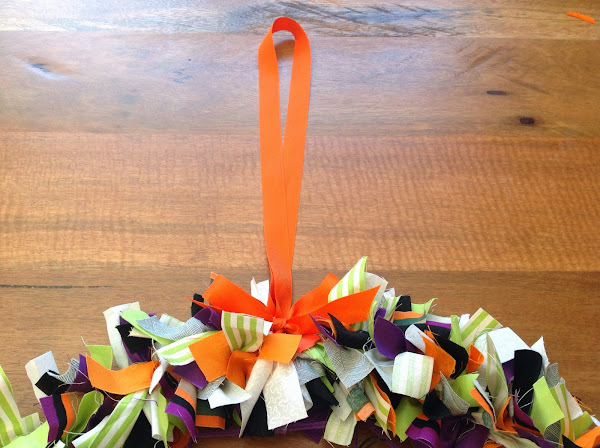 |
| A bright bow for hanging |
STEP NINE: Make it look pretty
Make sure all the strips are pulled forward and twisted so that the prints are facing outwards (not a problem if you've used only solids or double-sided prints if such a thing exists?
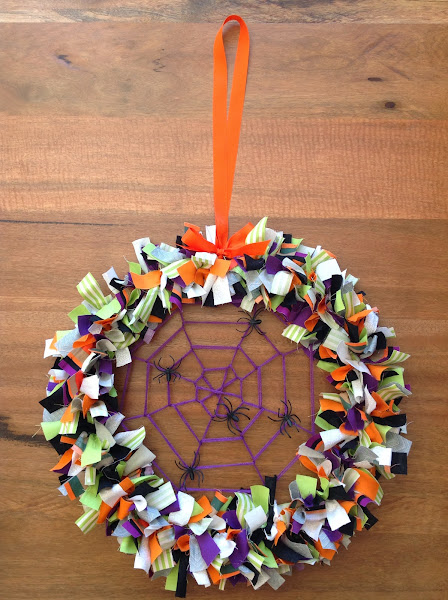 |
| Finished and awesome |
STEP TEN: Hang your new Spider Web Halloween Fabric Wreath!!
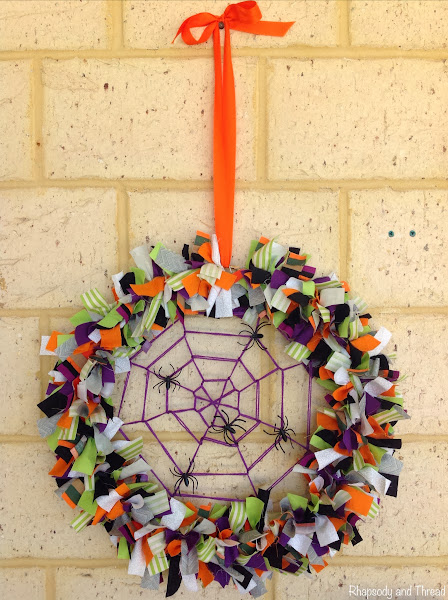 |
| Hung up outside, ready for the party! |
That looks awesome and I can't wait to see what everyone thinks at the party on Friday!
I actually had so much fun that I decided to make another one for a table setting, what do you think?
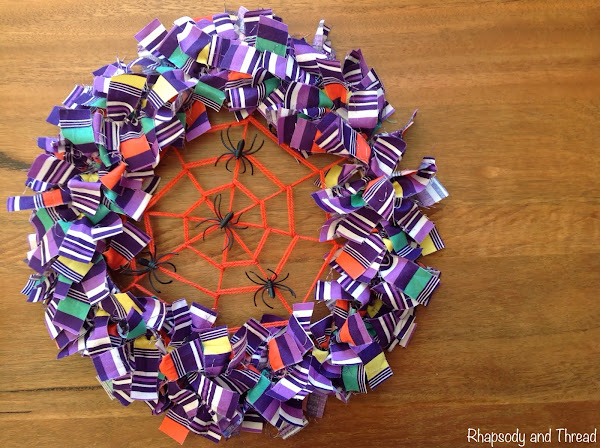 |
| A great table setting idea |
I used a smaller 10" hoop for this one - quicker and I didn't have a lot of that fabric hanging about. And you can see from the next picture how cute the little hoop looks next to the big hoop!
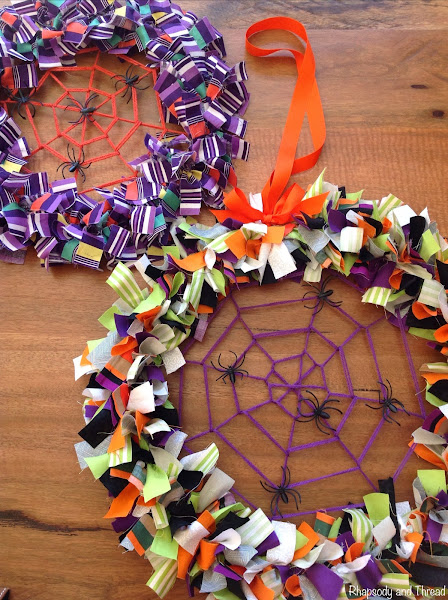 |
| My two creepy spidy wreaths together |
This project was simple and fun and I highly recommend giving it a go!!
Huge thanks to Dana at Dana Made It and Kristina at Hott Mama In The City for inspiring me!!
Happy Halloween everyone xx