Friday 27 December 2013

James Family Christmas --> The Best One Yet!

James Family Christmas by Rhapsody and Thread

Christmas 2013 was easily the best Christmas we have ever had. It was relaxed, fun, delicious and overflowing with laughter and love. It was everything we had hoped for for our first Christmas as a full family.

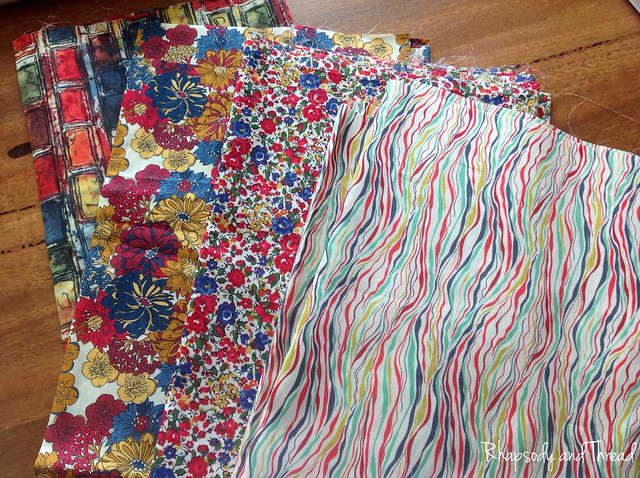
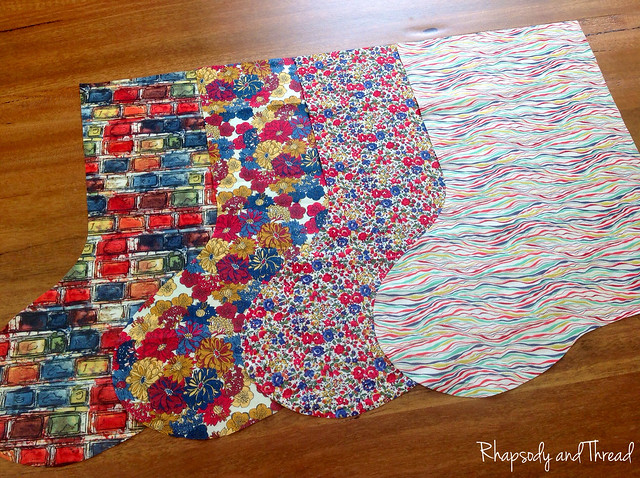
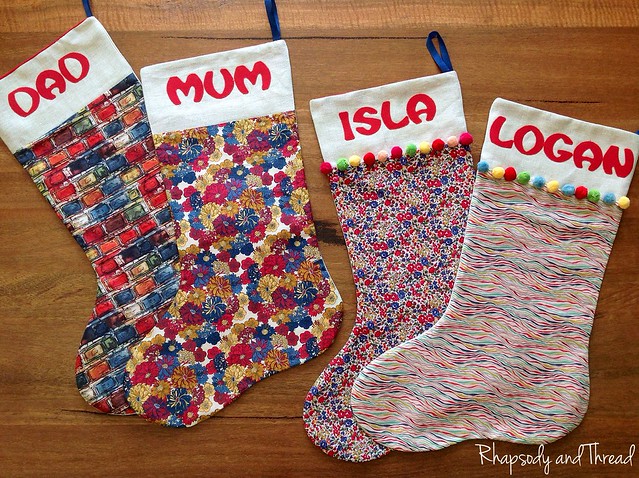
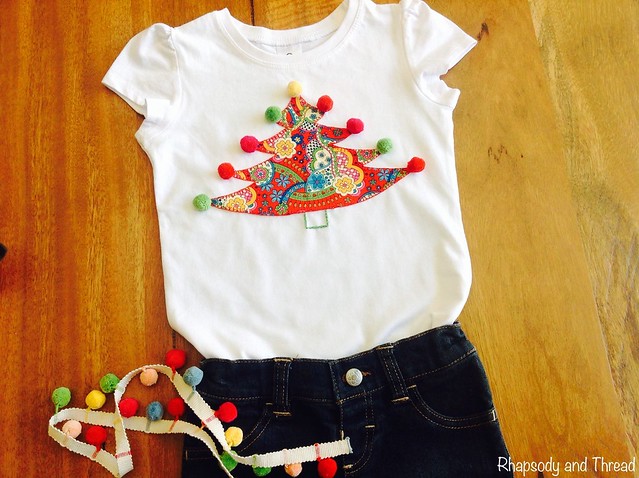
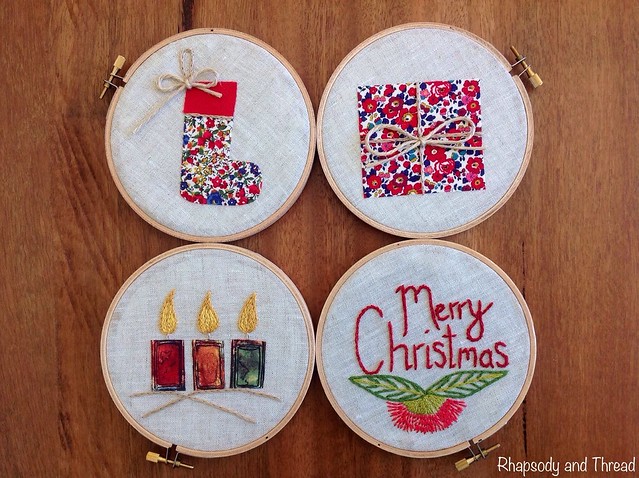
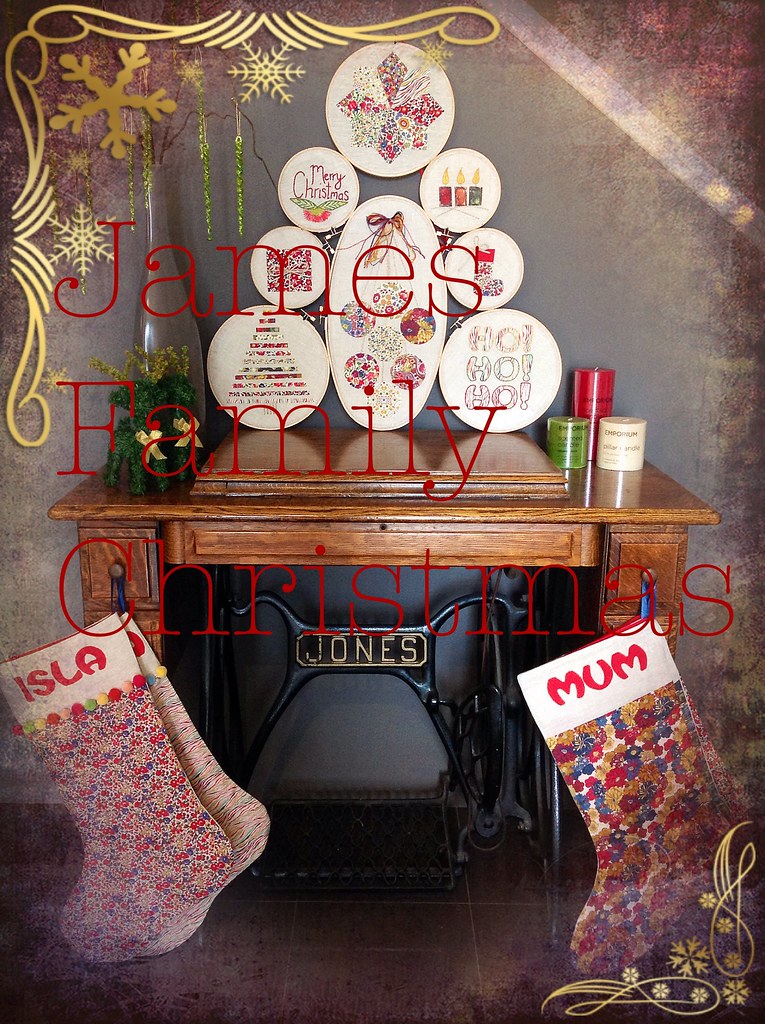
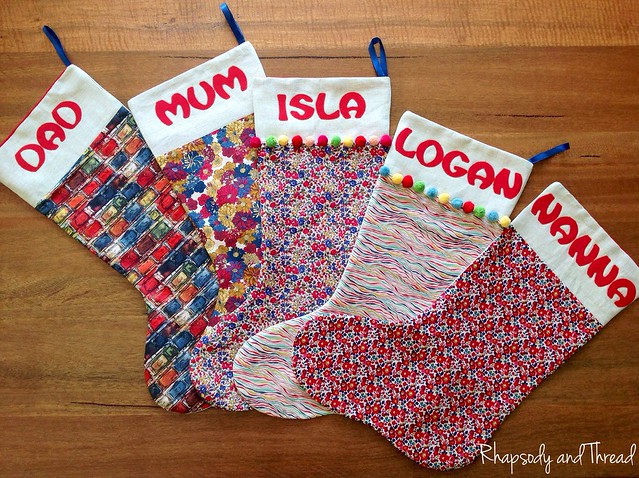
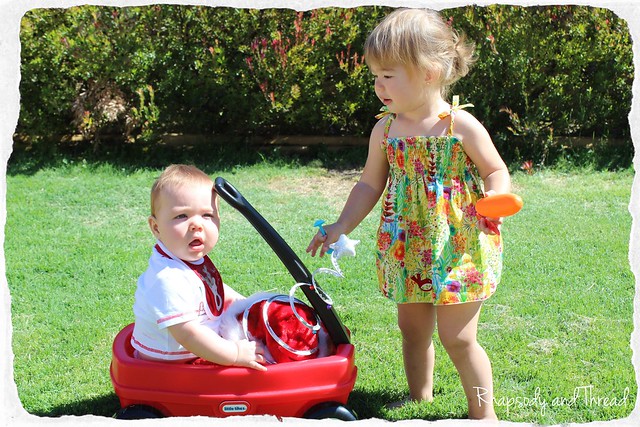
I managed to finish our family Christmas stockings - 3 days before the big day! That was a huge relief, especially because I'd been searching high and low for weeks for the perfect little gifts to fit in them. And Mum/nanna made a gorgeous little Liberty fabric summer dress for Isla to wear on the big day.

James Family Christmas Stockings by Rhapsody and Thread
Isla's Liberty Christmas Dress by Rhapsody and Thread

We set the Christmas tree up outside because the weather was supposed to be gorgeous (and it was!). We dug out the Christmas decorations and got started. Logan watched on from his activity centre while Isla 'helped' decorate. And by help, I mean she took off in the opposite decoration with anything she could get her hands on! Until one of the little glass baubles smashed - then she was given the job of hanging the plastic baubles! Here she is trying to hang them on the tree:

James Family Christmas by Rhapsody and Thread

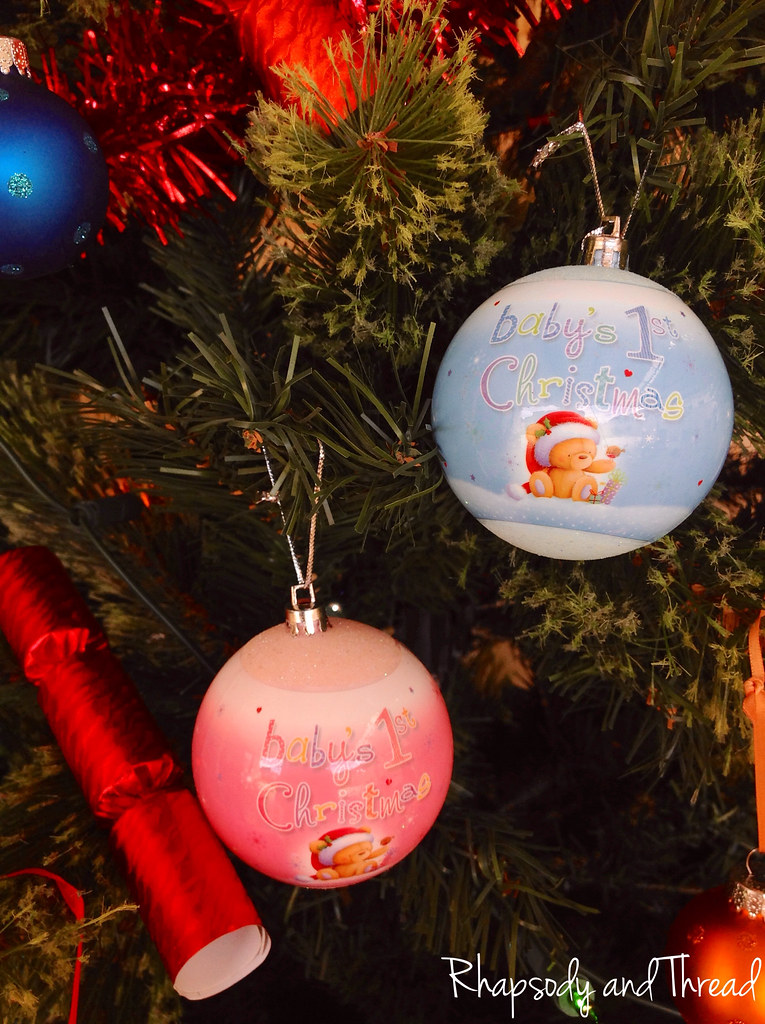
I actually got them last year when I was pregnant with Logan. They are 'Baby's 1st Christmas' baubles, and I couldn't resist them. I knew that I would need them both this Christmas and I loved seeing them hanging on the tree together.

James Family Christmas by Rhapsody and Thread

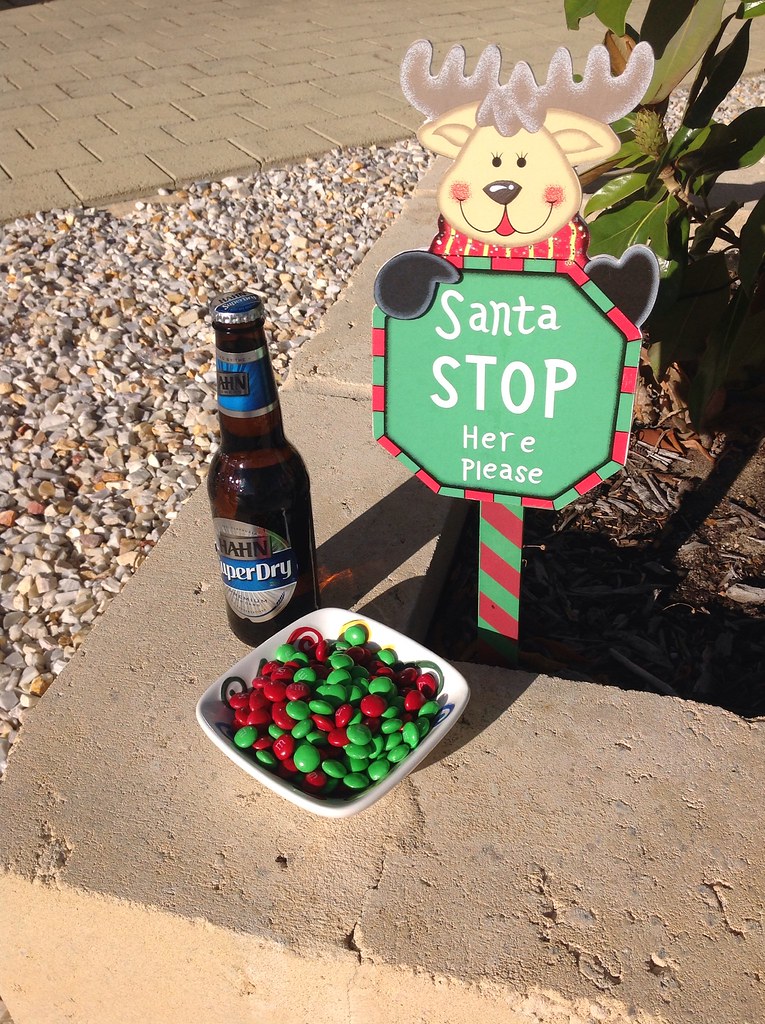
Once the tree was decorated and the champers (plural) were chilling in the fridge, we set out the beer and mm's for Santa and finally put our feet up ready for the big man to do his work.

James Family Christmas by Rhapsody and Thread

On Christmas morning, we woke up to the sweetest sounds! We could hear Logan gurgling away in his cot and Isla chattering to Bunny (her favourite teddy) as she always does. Hubby and I grabbed a baby each and pottered downstairs to start the day. We laid a quilt out next to the tree and sat down with the kids, whilst Nanna snapped away with her camera. They are still so young (9 and 21 months) so they needed help, but that was half the fun for us as well. We unwrapped books and games and there were a lot of cars and trucks for Logan - to balance out all the pink stuff that Isla got for Christmas last year. Isla got a pram to walk her new Dora doll that Santa dropped off. And Logan got this great trailer that became a fast favourite.

James Family Christmas by Rhapsody and Thread

I got spoiled too! Hubby got me a table-top Portable Photo Studio & Lighting Kit and I'm so excited to see how my photos turn out using the little tripod. And mum made up a hamper full of treats for all of us to enjoy over the Christmas period.

But the biggest treat?! Was the food. See, for the last two Christmas's I've been pregnant with our beautiful babies, and therefore unable to drink or enjoy ANYTHING tasty. So this year there was bottles of Champagne and seafood everywhere!

Mum and I set up the table outside next to the Christmas tree.

James Family Christmas by Rhapsody and Thread

And for brunch we had the most delicious Smoked Salmon Bruschetta with Champagne and my punch. It was SO yummy and really lovely to sit around the table together. Well most of us. We couldn't drag Isla away from her new toys for too long but Logan sat with us for a little while.

James Family Christmas by Rhapsody and Thread

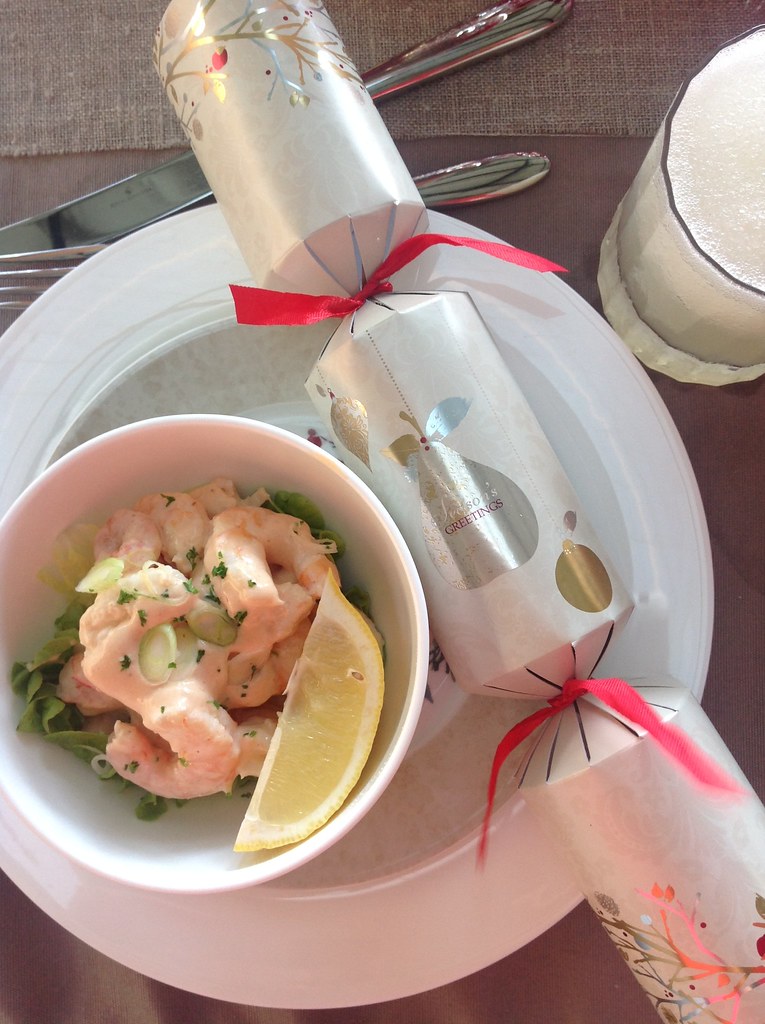
We ate SO much (as usual) but that is what Christmas is all about right? And we weren't going anywhere. We just relaxed and played with the kids until dinner time, which was even more exciting and delicious. We had my request --> Prawn Cocktails:

James Family Christmas by Rhapsody and Thread

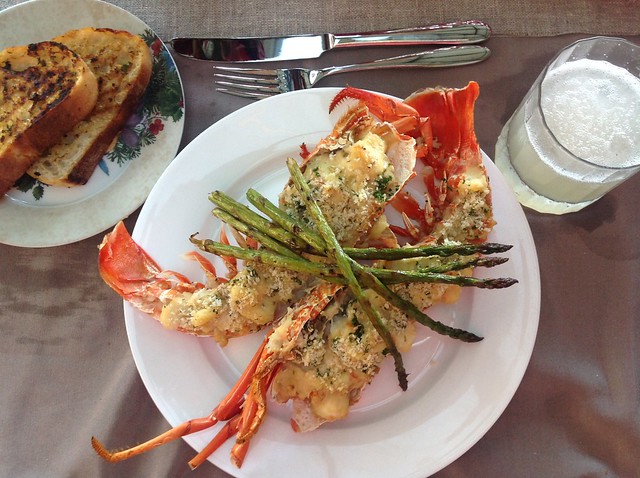
And for main course, hubby requested Crayfish Mornay -->

James Family Christmas by Rhapsody and Thread

Like I said, we spoiled ourselves - but it's been along time coming! Two Christmas's without seafood or alcohol? I had to make up for lost time. And I did. I had, like I said, 'easily the best Christmas we have ever had!!!'.

I hope you did too xx


Sunday 22 December 2013

Liberty Christmas Stockings For The Whole Family

Liberty Fabric Christmas Stockings by Rhapsody and Thread

Can anyone else believe Christmas is in 3 days? I know I can't!

What a year we have had, with the birth of our son and all the joy that comes with raising young babies. This blog has been my 'time out' and I've been lucky enough to finish 3 beautiful Christmas craft projects. I made the Embroidery Hoop Christmas Tree pictured above and blogged about here. I also made Isla's Christmas Tree T-Shirt for her toddler Christmas party (tutorial can be found here). And then I made these gorgeous Christmas stockings for the whole family.

I had hoped to do more projects, and I even got part way through a table runner and an advent calendar.... but I realised a few weeks ago that I had to focus on getting the Christmas stockings done - otherwise Santa would have nothing to load up for the kids. And it's a gooooooooooood thing I did, because they took a lot longer than I thought they would. What doesn't when you've got babies right?

So here's the fabric I got from Calico & Ivy back in early November.

Liberty Fabric Christmas Stockings (fabric pile) by Rhapsody and Thread

The fabric is the beautiful soft Liberty of London tana lawn and I don't know the name of the print on the far left - but the next along with the big flowers is Garla. I picked that one for my Christmas stocking because I love the colours and the big floral pattern. Next along is Emma and Georgina and I picked it for Isla because of the smaller pretty floral pattern. And lastly for Logan, on the far right, is the Reuben print. I love this print because it looks like streamers and the colours are still a bit masculine.

It's funny but I can't even remember where I got my template from... ah ha, I just remembered. It's kind of a funny story that I'm sure some people can relate to?! Years ago I bought 2 cross-stitch Christmas stocking kits online from America. It was before I had kids and had a lot more time and space to leave craft projects lying around, ready to be picked up and continued whenever. But these kits were tougher than I thought they would be. Mine was a snow scene and there was so many shades of blue and white. It was hard to keep track and I got bored easily. Needless to say, they got ignored year after year until we started our family. Last year I vowed that I would have Christmas stockings for the whole family by Christmas 2013. And so I said goodbye to my partially completed cross-stitch kits and I used the stocking templates from the kit to make my fabric ones. Here are the Liberty fabrics cut-out.

Liberty Fabric Christmas Stockings by Rhapsody and Thread

I used 100% linen on the tops and backs, and used red Kona Cotton from Carols of Midland for the linings and applique lettering. Mum helped me out with the applique - using her spoofy Pfaff machine to stitch the letters on. That saved me a lot of time.

And here are the completed stockings! Hubby, me, ratbag #1, and ratbag #2!

Liberty Fabric Christmas Stockings by Rhapsody and Thread

And then there's Nanna! I was half way through cutting out the templates when I realised that Nanna needs a stocking too! Something pretty to hold scotch and chocolates. And of course, I snagged her favourite Liberty print at Calico & Ivy - the red Betsy Ann!

Liberty Fabric Christmas Stockings by Rhapsody and Thread

So yeah, I got there in the end. And I can't wait to see what Santa fills them with! I hung them on the hall table near the front door so that he can find them easily ;o)

Liberty Fabric Christmas Stockings by Rhapsody and Thread

Merry Christmas x


Friday 13 December 2013

Hanging In The Hall --> My Embroidery Hoop Christmas Tree

I finally hung my embroidery hoop Christmas tree

I hung this up ages ago and have only just remembered to share how it looks - great right?! It's one of the few areas of the house that is decorated this year. I blame a combination of things including lack of space and time, and Isla's sticky fingers... But really I just haven't had the energy! I've been so busy sewing my little baby quilts together ready for the shop opening, and there's been all the other daily mum stuff. I'm not complaining at all, it's a great time of year and the kids are doing so well. I just think time has gotten away from me. At this rate, I'll probably find myself putting the tree up on Christmas Eve! Oh well, as long as there is a bottle of bubbly and my family around me - what more could I ask for?


Hey Hey I've been featured on the DMC Threads Blog! WooHoo!

It's so exciting to be featured on other blogs because it means a) someone is actually reading mine (lol) and b) they like something I've made. And in this case they liked 2 things I made for Christmas!

Emma - DMC's stitching blogger - liked the Christmas Tree Applique T-Shirt I made for Isla AND the Embroidery Hoop Christmas Tree! So cool.

Here is the link to her blog and the post "More Holiday Goodness". Thanks Emma!

Thursday 21 November 2013

T-Shirt Tutorial --> Christmas Tree Appliqué In 10 Easy Steps

 T-Shirt Tutorial --> Christmas Tree Appliqué In 10 Easy Steps

Christmas is just around the corner and the kiddies are all catching up at our place for a Christmas party next week. It's actually the mums that are catching up... the kids are just lucky we bring them along!! Haha, just kidding. We did the same thing last Christmas (seems like years ago) when the bubs weren't even walking yet. They all sat in a row with their cute little outfits on. This year, we'll be struggling to get them to sit together in one spot - and I think we're all just gonna stick them in Christmas t-shirts because they'll spend most of the time paddling in the little pool with no pants on! So cute!!

So, I bought plain white t-shirts for my two rugrats and thought I'd jazz them up myself with something Christmassy. They were only $3 at Target (bargain!!) and I found the perfect Liberty of London fabric in bright red with green/blue/pink/yellow patterns. It looks kind of Alice-in-Wonderlandish and is part of the Liberty Lifestyle - Bloomsbury Gardens Collection. The name is Virginia and the colourway is "Rich Red Blue". I think mum actually bought it at Purl Soho in New York a couple of years ago, with the hopes of making a dress for Isla... but it kept getting pushed to the back of the line - I think because it always looked so Christmassy to me. And so now I have the perfect job for it!

I decided on a Christmas tree for Isla's t-shirt because I really wanted to use the pom-poms I got at Calico & Ivy recently. The colours match perfectly and pom-poms are so girly (in my opinion :o). I made up a template to match her size 3 t-shirt and got busy. Here's the tutorial.

~o~o~o~o~o~o~o~o~o~o~o~o~o~o~o~o~o~

T-Shirt Tutorial --> Christmas Tree

Appliqué In 10 Easy Steps

~o~o~o~o~o~o~o~o~o~o~o~o~o~o~o~o~o~

You Will Need

 T-Shirt Tutorial --> Christmas Tree Appliqué In 10 Easy Steps

T-Shirt

Fabric

Pom-poms

Fusible webbing

Graph paper (or a pattern/template)*

Drawing tools --> pencil, eraser, sharpener, ruler, pen, marker

Cutting tools --> sharp scissors, rotary cutter and cutting mat*

Sewing tools --> needle, embroidery thread, pins

Equipment --> Sewing machine*, iron and ironing board

* These items are not essential but would definitely make your job easier.

~o~o~o~o~o~o~o~o~o~o~o~o~o~o~o~o~o~

Step by Step Instructions

Step One --> Design Your Christmas Tree Template

1) First, put the t-shirt on your bub.

Important Warning --> make sure your child is clean and does not have spaghetti sauce on their face or hands - unless you bought a red t-shirt, in which case it wouldn't matter ;o).

2) Work out the approximate dimensions of your tree based on the free space on the front of the t-shirt.

Remember that the sides of the t-shirt will wrap around the body so you may lose sight of your tree if you make it too wide. And if you're like me and you like to tuck the t-shirt in (so much cuter), you wouldn't want to design a really tall tree and the bottom half be lost.

Using a ruler and Dora The Explorer as a distraction to get her to stand still - I worked out that the perfect space on Isla's t-shirt was 6"H x 8"W. I marked this outline on my graph paper to help me draw my tree. You can draw your tree free-hand or trace a template straight on to the fusible webbing if you have one?! I didn't have a template and I wanted my tree to be symmetrical - so I used graph paper. If you want to use graph paper too, here's a great way to get a symmetrical tree.

3) Draw an outline of the space you have to work with on graph paper.

4) Draw dots in the shape of a tree. These will become your outer tips of your branches.

 T-Shirt Tutorial --> Christmas Tree Appliqué In 10 Easy Steps

5) Draw dots back in towards the centre of the tree to create the outline of each branch.

 T-Shirt Tutorial --> Christmas Tree Appliqué In 10 Easy Steps

6) Mark your numbers to follow like a dot-to-dot puzzle.

 T-Shirt Tutorial --> Christmas Tree Appliqué In 10 Easy Steps

7) Connect the dots.

 T-Shirt Tutorial --> Christmas Tree Appliqué In 10 Easy Steps

8) Copy the design on the other side to complete the tree. And there you have your template!

 T-Shirt Tutorial --> Christmas Tree Appliqué In 10 Easy Steps

Step Two: Trace Your Christmas Tree Design On To The Fusible Webbing

1) Trace your design, making sure that you draw on the correct side of the webbing.

 T-Shirt Tutorial --> Christmas Tree Appliqué In 10 Easy Steps

Step Three: Cut around the template, leaving a ¼" gap

 T-Shirt Tutorial --> Christmas Tree Appliqué In 10 Easy Steps

Step Four: Iron the template on to the reverse side of your fabric

Read the instructions specific to your fusible webbing for info on iron temperature etc.

 T-Shirt Tutorial --> Christmas Tree Appliqué In 10 Easy Steps

Step Five: Once cooled, cut the template out with sharp scissors and work out where you want to place it

 T-Shirt Tutorial --> Christmas Tree Appliqué In 10 Easy Steps

Step Six: Separate the paper backing from the fusible webbing

 T-Shirt Tutorial --> Christmas Tree Appliqué In 10 Easy Steps
 T-Shirt Tutorial --> Christmas Tree Appliqué In 10 Easy Steps

Step Seven: Stick it in position and iron it to secure it in place

Don't panic if it doesn't line up perfectly the first time - it's removable until it's ironed on to the t-shirt.

 T-Shirt Tutorial --> Christmas Tree Appliqué In 10 Easy Steps

Step Eight: Attach The Pom-Poms

1) Pick your 9 pom-poms for the tips of the branches.

I cut mine from the pom-pom garland I bought at Calico & Ivy recently, but you can buy them individually. I picked a yellow pom for the top to represent a star and went with red, green, and pink for the rest.

 T-Shirt Tutorial --> Christmas Tree Appliqué In 10 Easy Steps

2) Thread a sharp needle and come up carefully through the tip of the branch, then through your pom-pom.

 T-Shirt Tutorial --> Christmas Tree Appliqué In 10 Easy Steps
3. Then go back down through your pom-pom and the tip of the branch.
 T-Shirt Tutorial --> Christmas Tree Appliqué In 10 Easy Steps
 T-Shirt Tutorial --> Christmas Tree Appliqué In 10 Easy Steps

Step Nine: Blanket-Stitch* The Perimeter of the Tree

* I'll start by saying that this step is optional. I wasn't going to bother at first because it will probably only be worn once and the tree is secured well enough by fusible webbing and at the tips by the pom-poms... BUT I love the look of blanket-stitch AND I love hand-stitching. So I added this step in case you love the look of it too. Oh and note, if you love the look but don't love hand-stitching - blanket-stitch using your sewing machine prior to Step Eight: Attach the Pom-Poms. I personally find it easier to blanket-stitch by hand when I'm working with t-shirts because you don't have to worry about manouvering the t-shirt under a sewing machine to avoid sewing through the back (and we all know how I feel about sewing machines ;o)!

** If you don't know how to blanket-stitch, there are some great easy-to-follow tutorials out there on the internet. I learned through a gorgeous book called Stitched Gifts by Jessica Marquez.

 T-Shirt Tutorial --> Christmas Tree Appliqué In 10 Easy Steps
 T-Shirt Tutorial --> Christmas Tree Appliqué In 10 Easy Steps
Step Ten: Split-Stitch the Tree Stump

1. First, draw a template of your little tree stump. I used a magic pen - the ink disappears when ironed :o) ($4.50 at Carols of Midland!!), but you could use a regular pen as long as you cover the ink with your stitches (so you have to get your template perfect the first time).

 T-Shirt Tutorial --> Christmas Tree Appliqué In 10 Easy Steps

2. Thread your needle and split-stitch over the template. I used 4 threads so that the stitch would stand out. And you could use a simpler stitch like back-stitch if you like. It would look just as good. I prefer the textured look of split-stitch, that's why I use it almost all the time ;o).

 T-Shirt Tutorial --> Christmas Tree Appliqué In 10 Easy Steps
 T-Shirt Tutorial --> Christmas Tree Appliqué In 10 Easy Steps

Finito!

 T-Shirt Tutorial --> Christmas Tree Appliqué In 10 Easy Steps

Happy Stitching xx


Saturday 16 November 2013

Embroidery Hoop Christmas Tree

Embroidery Hoop Christmas Tree by Rhapsody and Thread

It's no secret that I love working with embroidery hoops! And linen!! And Liberty of London fabric!!! Ok, so I love working with a lot of things, but these are definitely in my top 10... :o)

So I couldn't resist making a whole Christmas Tree out of them. Mum gave me the oval hoop in the middle and I built my tree using 125mm and 200mm hoops from my own stash. I'm so happy with the shape!

I'm really happy with the colours too - although they are not the red/white/green of a typical Christmas palette. I picked my favourite Liberty fabrics and ended up with a red/green/yellow/blue palette instead! And it works!

~o~o~o~o~o~o~o~o~o~o~o~

So, I started with the Christmas Baubles Embroidery Hoop that sits in the middle of the tree. The baubles are so adorable and work perfectly in the portrait layout of the oval hoop! I was initially going for a more realistic look with them piled on top of each other, but I tried it out before I stuck them down and found that a lot of the prints were hidden/covered up. So I spread them out instead.

* Prints (clockwise from the top) are D'Anjo, Garla, Judy Rose, Delfie, Kaylie Sunshine, Margaret Annie, and Rania is in the middle.

Christmas Baubles Embroidery Hoop by Rhapsody and Thread
Christmas Baubles Embroidery Hoop
Christmas Baubles Embroidery Hoop by Rhapsody and Thread
Christmas Baubles Embroidery Hoop

I split-stitched strings in a creamy colour to mimic twine, and I tied a bow using embroidery thread in coordinating colours. I was originally going to use a big twine bow, but I love the colours of the embroidery thread and it looks so vibrant and pretty! And I think it still looks a bit rustic too, so I'm happy with it!

Christmas Baubles Embroidery Hoop by Rhapsody and Thread
Christmas Baubles Embroidery Hoop

Next, I made the Christmas Tree Embroidery Hoop and it worked out great - thanks to my 'magic pen'. Well, it's technically mums 'magic pen' but I use it that much that I have taken ownership. It's called a Pilot Frixion Ball pen and it draws on fabric and disappears when heated (ironed). Magic!! She got it at Carols of Midland if you're interested in having such magic. It is useful for almost every project, whether I'm drawing reference grids or lines to help with appliqué, or free-drawing shapes for embroidery.

Here, let me show you what I mean. See here, I drew a grid to make sure that my tree was in the centre and all the fabrics strips were in line. And then in the next pic you can see that once ironed - the ink is gone!

* Prints (from the top) are Xanthe Sunbeam, Margaret Annie, n/a, Mitsi, Betsy Ann, DAnjo, Rania, Pep, Garla, Kaylie Sunshine, Emma & Georgina, and Reuben Kelly.

Christmas Tree Embroidery Hoop by Rhapsody and Thread
Magic pen gridlines that disappear when heated.
Christmas Tree Embroidery Hoop by Rhapsody and Thread
Christmas Tree Embroidery Hoop

Next I made the HO! HO! HO! Christmas Embroidery Hoop using just the Reuben Kelly print (purchased at Calico and Ivy). I traced the letters using my trusty Fiskars stencil, and ironed them in place using Vliesofix (both from Spotlight). Then I split-stitched a cute border and voila!

HO! HO! HO! Christmas Embroidery Hoop by Rhapsody and Thread
HO! HO! HO! Christmas Embroidery Hoop

Next up is my four smaller hoops that represent four more aspects of Christmas that I love - Christmas stockings full of treats, Christmas presents full of joy, Christmas candles that fill the air with the scents of vanilla, cinnamon, and nutmeg, and the words "Merry Christmas" that warm my heart.

* Prints (clockwise from top left) are Emma & Georgina (red Kona top of the stocking), Betsy Ann, and n/a.

Embroider Hoop Christmas Tree by Rhapsody and Thread
Clockwise from top left: Christmas Stocking, Christmas Present, Christmas Candles, and Merry Australian Christmas Embroidery Hoops

I just have to give a special shout-out to my beautiful hand-stitched Merry Australian Christmas Embroidery Hoop. I love this hoop. It was my first attempt at stitching words... not too bad I think. I was going to use a stencil but thought it would look more personal if it was 'my writing'.

And the motif was my interpretation of a Red Flowering Gum - a Eucalyptus tree native to South-West Western Australia. It's a beautiful tree with masses of red pom-pom-like flowers when in bloom.

Not bad for a first attempt!

Merry Australian Christmas Embroidery Hoop by Rhapsody and Thread
Merry Australian Christmas Embroidery Hoop

Hmmm, what's left? It must be the Christmas Star Embroidery Hoop! This one's a beauty.

It's lucky that mum found a patchwork star at the last minute because I was going to use a gorgeous little Liberty fabric-scrap wreath I made last week. I had always wanted a star in the top hoop - to make it a true Christmas tree - but this wreath was too beautiful to leave out (or so I thought :o).

* Prints (clockwise from the top) are Lesleys, Reuben Kelly, Betsy Ann, D'Anjo, Emma & Georgina, Rania, Kaylie Sunshine, and Delfie. And the star pattern came from the Gem Stars Quilt in the Splendid Quilts magazine.

Christmas Star Embroidery Hoop by Rhapsody and Thread
Christmas Star Embroidery Hoop

I finished that star hoop yesterday and finally got to piece the whole tree together. It looks amazing.

Here are some closeups:

Embroidery Hoop Christmas Tree by Rhapsody and Thread

And the final shot of my Embroidery Hoop Christmas Tree:

Embroidery Hoop Christmas Tree by Rhapsody and Thread
Embroidery Hoop Christmas Tree

Merry Christmas xxx

~o~o~o~o~o~o~o~o~o~o~o~

Suppliers:

Calico & Ivy --> Liberty of London tana lawn and the 100% linen background fabric.

Spotlight --> Embroidery hoops and thread, Vliesofix, twine, stencil.

Carols of Midland --> Pilot Frixion Ball Pen.

~o~o~o~o~o~o~o~o~o~o~o~